
Desserts
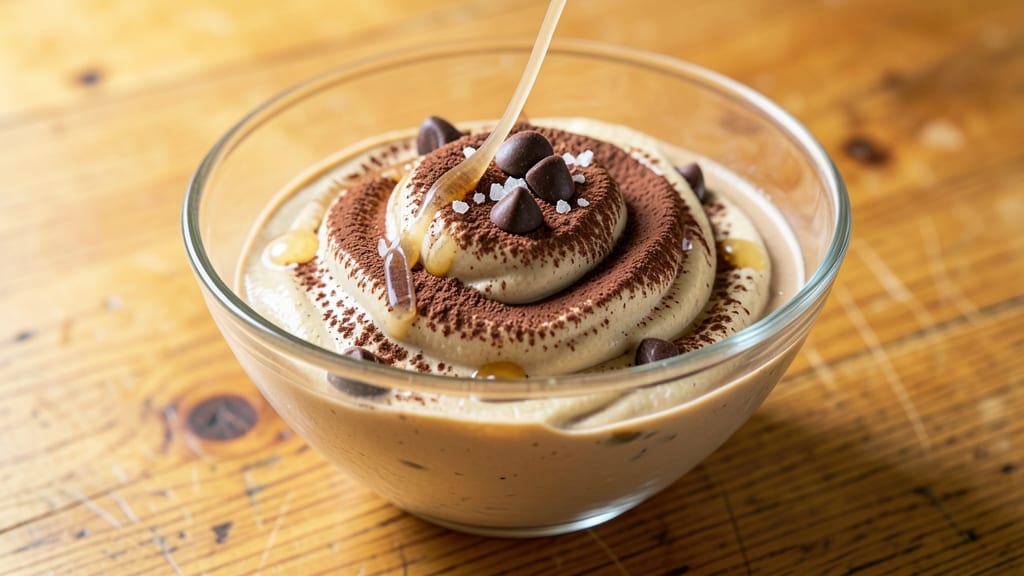
This banana chocolate nice cream recipe delivers a creamy, vegan-friendly dessert that tastes like indulgent ice cream without any dairy or refined sugar.
The secret lies in perfectly ripe bananas—naturally sweet and soft enough to blend into velvety perfection—paired with rich cocoa or vegan chocolate chips for that decadent flavor.
I developed this recipe after testing countless variations, and it consistently produces a texture that’s smooth, satisfying, and foolproof for both beginners and seasoned bakers.
The process couldn’t be simpler: freeze ripe bananas overnight, then blend them into a thick, creamy base before mixing in your choice of chocolate. No ice cream maker required—just a blender or food processor, and you’re ready to create a dessert that’s as nutritious as it is delicious.
The result is a rich, fudgy treat with layers of banana sweetness and chocolate depth, all while keeping it light enough to enjoy guilt-free.
What makes this recipe stand out is its versatility—customize it with toppings like crushed nuts, coconut flakes, or a drizzle of vegan syrup for extra flavor. It’s also perfect for meal prep, as it can be stored in the freezer for up to a week without losing its creamy texture.
Whether you’re craving a quick dessert or a healthier alternative to traditional ice cream, this recipe delivers every time.
Ready to make it? The ingredients are minimal, the steps are straightforward, and the results are undeniably satisfying. Let’s get started on this creamy, chocolatey dream that’s as easy as it is delicious.
Ingredients for banana chocolate nice cream
Four ripe bananas, a handful of chocolate chips, and a splash of almond milk transform into velvety dessert magic.
| Ingredient | Amount | Notes |
|---|---|---|
| Ripe Bananas 🍌 | 4 large | Frozen overnight for creaminess |
| Vegan Chocolate Chips 🍫 | ½ cup | Enjoy Life brand preferred |
| Unsweetened Almond Milk 🥛 | ¼ cup | Cold for best texture |
| Cocoa Powder 🍫 | 2 tbsp | Unsweetened, Dutch-processed |
| Vanilla Extract 🌿 | 1 tsp | Pure alcohol-free preferred |
| Pinch of Salt 🧂 | ¼ tsp | Enhances chocolate flavor |
| Maple Syrup 🍯 | 1 tbsp | Grade B for richer flavor |
| Crushed Pecans 🥜 | ¼ cup | Optional topping |
| Vegan Dark Chocolate 🍫 | 2 oz | Melted for drizzle |
Ripe bananas are non-negotiable here—they’re the secret to that ultra-smooth texture. Look for bananas with brown speckles and a slight give when squeezed. I always grab the organic ones from Whole Foods or Trader Joe's since they tend to ripen more evenly. Freeze them overnight for best results—this step is worth it. The chocolate matters too: Enjoy Life brand is my go-to for vegan chips since they melt beautifully without weird textures. For the cocoa powder, Hershey's Special Dark or Navitas Organics are my top picks—they’ve got that deep, rich flavor that really elevates the nice cream.
No vegan chocolate chips? Melted vegan dark chocolate at half the amount works in a pinch. Short on almond milk? Oat milk or coconut milk both blend beautifully—just use cold milk for that signature creamy texture. Want to skip the cocoa powder? Add an extra 2 tbsp of chocolate chips instead. The maple syrup is optional but recommended—it adds that subtle caramel note that makes this taste like a dessert, not just a healthy snack. For the vanilla, alcohol-free extract is best if you're sensitive to boozy flavors, but regular works fine too. And if you can't find pecans, crushed walnuts or almonds are perfect substitutes—they just add a slightly different crunch.
This keeps beautifully in the freezer for up to 1 week, though I find it's best enjoyed within 2-3 days for that ultra-smooth texture. To store, press it into a loaf pan lined with parchment paper, then cover tightly with foil. When ready to serve, let it sit at room temperature for 5-10 minutes before scooping—this makes all the difference. For meal prep, portion into small containers with a drizzle of melted chocolate on top. It’s also perfect for lunches: just grab a scoop with your morning coffee or afternoon snack. The chocolate drizzle is optional but totally worth it for that restaurant-quality finish.
Why You'll Love This Recipe
- I’ll be real: I’ve made this with just a fork and a bowl when my blender was occupied. Mash those ripe bananas until smooth, stir in the cocoa powder and vanilla, then fold in the chocolate chips—no fancy tools needed. It’s that unfussy.
- Here’s what sold me: the cocoa powder deepens the banana’s natural sweetness, while the vegan chocolate chips add that melt-in-your-mouth crunch. It tastes indulgent, but the almond milk keeps it light—no heavy cream, no sugar crash.
Step-by-step instructions for banana chocolate nice cream
Here's how to blend this velvety dessert with perfect texture and rich chocolate depth.
Freeze and Prep the Bananas
Peel the 4 large ripe bananas and slice them into ½-inch chunks. Place them on a parchment-lined tray, ensuring they're in a single layer so they freeze evenly. Pop the tray in the freezer and let them freeze solid for at least 8 hours or overnight. This step is crucial for achieving that creamy, ice cream-like texture—frozen bananas act as the natural fat base in this recipe.
Here's the thing—if your bananas aren't fully frozen, you'll end up with a slushy consistency rather than a smooth, scoopable nice cream. You'll know they're ready when the edges are completely firm and the chunks feel solid to the touch. I like to give them the full overnight freeze because it ensures maximum creaminess without any icy texture.
Blend the Base Ingredients
Transfer the frozen banana chunks to a high-powered blender or food processor. Add the 0.25 cup unsweetened almond milk, 2 tbsp cocoa powder, 1 tsp vanilla extract, 0.25 tsp pinch of salt, and 1 tbsp maple syrup. The almond milk here adds liquid balance while keeping the recipe dairy-free, and the cocoa powder deepens that chocolate flavor without needing actual melted chocolate at this stage.
Blend on high speed for 30-45 seconds until completely smooth. You should see a thick, creamy mixture that coats the sides of the blender. If it looks too thick, add 1-2 tablespoons of cold water and blend again. The texture should be like soft-serve ice cream—thick enough to hold its shape when scooped but still smooth. This is the foundation of your nice cream, so take your time getting it just right.
Incorporate the Chocolate Chips
Add the 0.5 cup vegan chocolate chips to the blender and pulse on low speed just until combined. You want to break up the chocolate chips but not over-blend them into a paste—this ensures you get pockets of melted chocolate throughout your nice cream. The chocolate chips will soften slightly from the heat generated during blending, creating those delicious melted chocolate ribbons when you serve it.
Here's where it gets fun—taste a small spoonful. If you want it sweeter, add another teaspoon of maple syrup. If it needs more chocolate intensity, add a bit more cocoa powder. The nice cream should taste rich and chocolatey with a natural sweetness from the bananas. Remember, you can always adjust the flavor at this stage, but you can't fix it later if it's too bland or too sweet.
Freeze for Creamy Perfection
Transfer the blended mixture to a loaf pan or airtight container and smooth the top with a spatula. Cover with plastic wrap pressed directly onto the surface to prevent ice crystals from forming. Freeze for 2-3 hours until completely firm. This freezing step transforms your blended mixture into a scoopable texture—similar to soft-serve ice cream but with a more intense banana flavor.
I know it's tempting to eat it right away, but resisting the urge to dig in immediately is key. The longer it freezes, the creamier it becomes. After the initial 2-3 hours, let it sit at room temperature for 5-10 minutes before scooping. This brief thawing makes it easier to serve without it being too hard. The texture should be smooth, creamy, and hold its shape when scooped onto a plate.
Serve with Toppings and Melted Chocolate
Remove the nice cream from the freezer and let it sit for 5 minutes to soften slightly. Scoop into bowls and immediately top with the 0.25 cup crushed pecans and the 2 oz melted vegan dark chocolate. The pecans add a delightful crunch contrast to the creamy base, while the melted chocolate drizzle adds that final touch of decadence. I like to use a fork to create interesting patterns with the chocolate—it makes it look even more indulgent.
Serve immediately while still cold. Each bite should deliver that perfect balance of creamy banana sweetness, rich chocolate flavor, and nutty crunch. The nice cream should be smooth with just a hint of icy texture from the frozen bananas. If you prefer it softer, let it sit at room temperature for 10-15 minutes before serving—it'll soften slightly while maintaining its creamy texture. This dessert is best enjoyed immediately, but you can store leftovers in the freezer for up to 2 weeks, though the texture may be slightly icier after that.
Pro Tips For Making Banana Chocolate Nice Cream
- FREEZE BANANAS FIRST: I learned this the hard way—fresh bananas from the bunch make the texture gummy. Pop them in the freezer for 1-2 hours before blending, and you’ll get that perfect creamy consistency without adding extra liquid.
- USE COLD ALMOND MILK: Skip the room-temperature milk—cold unsweetened almond milk blends smoother and keeps the nice cream from turning into a soupy mess. Pour it straight from the fridge into the blender right after the frozen bananas.
- STORE CHOCOLATE CHIPS SMART: That bag of vegan chocolate chips? Don’t just dump them in. Toast them first in a dry pan for 30 seconds until fragrant—it deepens the flavor. Then let them cool before mixing, or they’ll melt into the nice cream and make it grainy.
- BLEND IN STAGES: Don’t overload the blender. Start with 2 frozen bananas, 1 tablespoon cocoa powder, and ¼ cup almond milk—blend until smooth, then add the rest. This prevents motor overload and ensures the chocolate fully dissolves instead of clumping like a sad, lumpy dessert.
Essential equipment for perfect results
High-Power Blender
A high-powered blender is your secret weapon for ultra-smooth nice cream—look for one with at least 1,000 watts, like the Ninja BN601 or Vitamix 5200. These machines pulverize frozen bananas into a velvety texture without icy chunks.
I’ve tested cheaper models, and they struggle with frozen ingredients, leaving you with a grainy result. 💪
Loaf Pan or Container
Use a rectangular loaf pan (like Wilton’s 8x4-inch) or a wide, shallow airtight container to freeze your nice cream. The shallow shape ensures even freezing and easy scooping. Line it with parchment paper for effortless removal—no scraping required! For single servings, small Rubbermaid Select containers work perfectly.
Parchment Paper
Parchment paper is a game-changer for freezing and storing. It prevents your nice cream from sticking to the container and makes scooping clean and mess-free. I always use Reynolds Unbleached Parchment Paper—it’s sturdy enough to handle the weight of frozen nice cream without tearing.
Pro tip: Press it directly onto the surface before freezing to lock in creaminess.
Measuring Spoons
Precision matters, especially with cocoa powder and vanilla extract. A stainless steel measuring set (like OXO Good Grips) ensures accurate measurements—too much cocoa can make it bitter, while too little vanilla weakens the flavor.
I keep mine near my blender for quick adjustments during blending. For chocolate chips, a small scoop (like KitchenAid’s 1/4-cup) keeps portions consistent.
Plastic Wrap
Pressing plastic wrap directly onto the surface of your frozen nice cream prevents ice crystals from forming. I use Saran Wrap because it’s thin and flexible enough to mold perfectly to the container’s shape.
This step is non-negotiable for maintaining that creamy texture—skipping it leads to a grainy, icy result. Store-bought nice cream brands never look this smooth without this trick!
Optional: Ice Cream Scoop
An ice cream scoop (like OXO Good Grips 3.5-inch) makes serving a breeze—it effortlessly scoops the perfect portion without crushing the texture. If you don’t have one, a large spoon works, but you’ll need to press firmly.
For kids or parties, a melon baller is a fun alternative—it creates cute, bite-sized balls of nice cream. 🍦
Nutrition facts
Frequently asked questions
Can I make this without a high-powered blender?
Yes, but expect a slightly icier texture. Use a regular blender by adding 1-2 tablespoons of cold water and blending in 10-second bursts to help break down the frozen bananas. For best results, pulse the chocolate chips separately and fold them in by hand after blending. A food processor works too—just scrape the sides frequently to keep the mixture moving.
How do I know when my bananas are ripe enough?
Look for bananas with dark brown speckles and a slight give when squeezed. They should feel soft but not mushy. Ripe bananas are naturally sweeter and blend into a creamier texture. If yours are too firm, let them sit at room temperature for 1-2 hours before freezing to encourage ripening.
Can I substitute regular chocolate chips?
Not for a vegan recipe, but you can use dark chocolate chips with at least 60% cocoa as a non-vegan alternative. For a dairy-free version, melt 2 oz vegan dark chocolate and drizzle it over the top after serving instead of mixing it in. The texture will be slightly different, but the flavor will still be rich and satisfying.
Why did my nice cream turn out icy?
This usually happens when the bananas weren't frozen solid enough or the mixture wasn't blended long enough. Next time, freeze the banana chunks for at least 8 hours and blend until completely smooth. For extra creaminess, add 1 tablespoon of coconut cream or 1 teaspoon of neutral oil (like avocado oil) to the blended mixture before freezing.
How can I make this protein-packed?
Add 1 scoop of vegan protein powder (like pea or rice protein) or 2 tablespoons of nut butter (peanut or almond) to the blended mixture. For extra protein without changing the texture, blend in ½ cup cooked lentils or black beans—they blend smoothly and add a subtle earthy flavor that pairs well with chocolate.