
Desserts
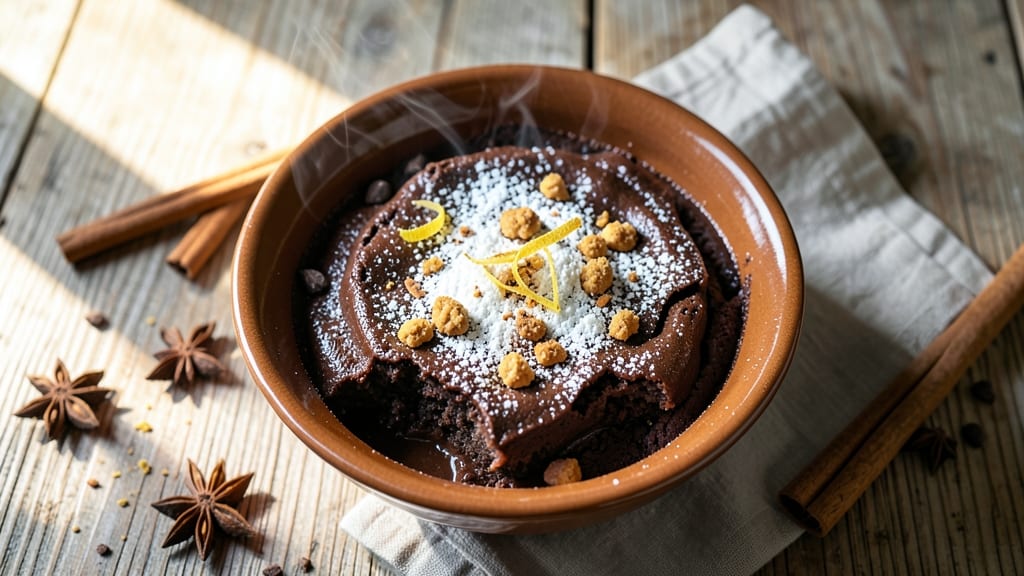
This British chocolate pudding recipe brings nostalgic warmth to your table with its signature layers of spiced suet and velvety chocolate filling. The secret lies in steaming the pudding just until set—creating that perfect contrast between tender, spiced crust and rich, gooey center.
I first tried this recipe during a chilly British winter, and it became an instant family favorite for holiday gatherings.
The traditional method uses suet for structure, but modern twists include gluten-free or vegan alternatives like coconut oil. What makes this dessert special is its simplicity: just mix, steam, and serve with custard or chocolate sauce.
The spices—cinnamon and nutmeg—add depth that complements the chocolate beautifully, making every bite feel like a cozy embrace.
By the time you invert the pudding onto a warm plate, you'll have a dessert that's both impressive and comforting. The outside remains tender while the inside stays rich and moist, perfect for sharing with loved ones.
This recipe delivers restaurant-quality results with minimal effort, proving that some traditions are worth preserving.
Whether you serve it as a centerpiece for Christmas or a special treat year-round, this pudding never disappoints. The key is patience—letting it steam slowly ensures the perfect texture. Ready to recreate this British classic in your own kitchen? Let's get started.
Ingredients for british chocolate pudding
Six spiced layers and a velvety chocolate heart—this British classic comes together with simple ingredients.
| Ingredient | Amount | Notes |
|---|---|---|
| Suet 🧈 | 1 cup | Fresh or packaged, crumbled fine |
| All-Purpose Flour 🌾 | 1 cup | Sifted for light texture |
| Granulated Sugar 🍚 | ¾ cup | White or light brown |
| Unsweetened Cocoa Powder 🍫 | ½ cup | Natural or Dutch-processed |
| Ground Cinnamon 🌿 | 1 tbsp | Freshly ground preferred |
| Ground Nutmeg 🌿 | ¼ tsp | Freshly grated for warmth |
| Salt 🧂 | ½ tsp | Fine sea salt preferred |
| Dark Chocolate Chips 🍫 | 1 cup | 70% cocoa or higher |
| Milk 🥛 | 1 cup | Whole milk for richness |
| Large Eggs 🥚 | 2 whole | Room temperature |
| Vanilla Extract 🌸 | 1 tsp | Pure vanilla preferred |
| Butter 🧈 | ½ cup | Unsalted, softened |
| Custard Powder 🥛 | 2 tbsp | For serving (optional) |
Suet is the star here—fresh suet from the butcher gives the best texture, but the packaged kind works too. Look for good marbling if you're buying a whole piece to crumble yourself. The cocoa powder matters—Dutch-processed for smoother flavor, natural for that classic bitterness. I always grab extra vanilla extract from Trader Joe's—it's the good stuff, not the imitation kind. For the chocolate chips, 70% cocoa or higher keeps it rich without being overpowering.
No suet? Coconut oil or vegetable shortening works in a pinch—just use the same amount. Fresh nutmeg is ideal, but ground works at half the amount. The milk can be swapped for cream for extra richness or almond milk for a lighter version. Short on butter? Olive oil or coconut oil keeps things moist, though the flavor will differ slightly. For the custard powder, store-bought vanilla sauce is a great shortcut if you're not making it from scratch.
Store the dry ingredients—flour, cocoa, spices—in airtight containers for up to 6 months. The suet and butter keep in the fridge for 3 months if wrapped tightly. Once mixed, the pudding batter can be refrigerated for 24 hours before steaming. The finished pudding reheats beautifully—just warm it in the oven for 10 minutes at 350°F to restore that gooey center. Serve with extra chocolate chips or a dusting of cocoa powder for that classic touch.
Why You'll Love This Recipe
- No-Fuss Mix: I swear by this recipe because it’s the kind of dessert that doesn’t demand perfection—just a bowl, a whisk, and a hot water bath. The suet melts into the flour and sugar like butter in toast, so you’re not left with dry crumbs or lumpy batter.
- Rich Without Guilt: That deep, velvety cocoa powder and a whisper of cinnamon? It’s the kind of chocolatey satisfaction that feels indulgent but won’t leave you regretting the calories. Honestly, the first bite makes me forget I’m eating something this simple.
- Tea Time Hero: Between us, this is my go-to for afternoon tea or when friends drop by unexpectedly. Serve it warm with custard, and suddenly you’re hosting a British afternoon tea without the fuss of scones or finger sandwiches.
- Budget Magic: A single box of suet and a bag of cocoa stretch to feed four—or even six if you’re sneaky with portions. I’ll be real: it’s my secret weapon for dessert nights when the grocery budget is tight but the cravings aren’t.
Step-by-step instructions for British chocolate pudding
Here's how to create that classic British comfort dessert with rich chocolate layers and spiced suet crust.
Prepare the Spiced Suet Crust
Preheat your oven to 375°F. In a large bowl, combine the 1 cup suet with the 1 cup all-purpose flour, 0.75 cup granulated sugar, 0.5 cup unsweetened cocoa powder, 1 tablespoon ground cinnamon, 0.25 teaspoon ground nutmeg, and 0.5 teaspoon salt. Use your fingers to rub the mixture together until it forms a crumbly, cohesive texture—this ensures even distribution of spices throughout the crust.
Press half of this mixture firmly into the bottom of a 9-inch round baking dish, creating an even layer. You want it compact but not packed down too tightly—it should hold its shape when you lift the dish. Sprinkle half of the 1 cup dark chocolate chips over this crust. Repeat with the remaining crust mixture and chocolate chips, creating a second layer. This layered approach gives that signature British pudding texture with chocolate pockets throughout.
Make the Chocolate Filling
In a separate bowl, whisk together the 2 whole large eggs, 1 cup milk, 1 teaspoon vanilla extract, and the remaining 0.5 cup softened butter until completely smooth. This mixture should be well combined but still slightly thick—it will become silky as it bakes. Pour this filling evenly over the layered crust in your baking dish, spreading it gently to distribute it completely.
Here's the thing—don't overmix the filling. You want just enough to create a smooth, velvety texture without developing any lumps. The residual heat from the crust will help blend everything perfectly during baking. The filling should cover the crust completely but not overflow the dish.
Bake to Golden Perfection
Place the baking dish on the middle rack of your preheated oven and bake for 40-45 minutes. You'll know it's done when the top is deep golden brown and the edges are slightly pulled away from the dish. The center should still have a slight wobble when you gently shake the dish—this indicates the filling is set but still moist.
I like to check for doneness at the 35-minute mark
Remove the pudding from the oven and let it rest for 5 minutes before serving. This brief resting period allows the layers to set slightly and makes it easier to slice. The pudding should be warm but not hot—perfect for serving immediately with a scoop of vanilla ice cream or a dusting of 2 tablespoons custard powder mixed with a splash of milk for a traditional British touch. For the best experience, serve each portion directly from the baking dish while still warm. The contrast between the warm, spiced crust and the cool, creamy topping creates that perfect balance of textures and temperatures. Each bite should deliver a rich chocolate flavor with warm cinnamon and nutmeg notes from the crust.Serve Warm with Optional Custard
Pro Tips For Making British Chocolate Pudding
- GRATE THE SUET: I learned this the hard way—chopping suet into tiny cubes just won’t cut it. Use a box grater or food processor to turn it into fine, even crumbs, or the pudding will have an uneven texture. No food processor? A sharp knife and a lot of elbow grease work, but the grater saves time and frustration.
- SIFT THE DRY INGREDIENTS: Skip the sifting, and you’re asking for lumps in your pudding. Cocoa powder and flour especially love to clump, so take the extra 30 seconds to sift them together into a bowl. Trust me, your pudding will be smoother—and your mouth will thank you later.
- STOP WHEN IT’S JUST SET: Overbaking is the enemy here. The pudding should spring back when gently pressed, not feel firm like a brick. If you pull it out too early, it’ll wobble like jelly; too late, and it’ll be dense and dry. Test it at 10-minute intervals—better safe than sorry.
- USE DARK COCOA POWDER: Natural (unsweetened) cocoa powder is your best bet, but if you’re using Dutch-processed (alkalized), add a pinch of baking soda to the mix. The flavor’s subtly different, but the texture stays rich and fudgy. And for the love of pudding, don’t skimp on the cocoa—this isn’t the place to cut corners.
Make-ahead tips for this recipe
Prep Ahead Strategy
Mix the dry ingredients—flour, cocoa, spices, and suet—up to 24 hours in advance and store in an airtight container in the fridge. This saves time on baking day and ensures even spice distribution.
I like to label it clearly so I don’t forget what it is—trust me, you’ll thank yourself later! The batter itself can also be prepped 12 hours ahead and refrigerated, though it’ll be slightly thicker when cold.
Just let it sit at room temperature for 30 minutes before baking to restore proper consistency. 🧈
Steaming Shortcut
If you’re short on oven space, use a steamer basket instead of baking. Line a large pot with parchment paper, pour the batter into a 9-inch round mold, and steam over simmering water for 45-50 minutes.
Check doneness by inserting a toothpick—it should come out with moist crumbs, not wet batter. This method works especially well for smaller batches or when you’re making multiple puddings at once. The texture stays just as rich, though the crust will be slightly softer. ⏰
Freezing for Later
This pudding freezes beautifully for up to 3 months—perfect for holiday prep! Let it cool completely, wrap tightly in plastic wrap followed by aluminum foil, and label with the date.
To serve, thaw in the fridge overnight, then warm in a 350°F oven for 10-15 minutes until the center is gooey again. The texture recovers almost perfectly, though it may need a splash of milk to restore moisture. I’ve done this for Christmas mornings, and it’s always a hit! ❄️
Double Batch Hack
Make two puddings at once by using a 9-inch and 8-inch round baking dish. The smaller one will cook slightly faster, so check it first. This is a game-changer for gatherings—you’ll have leftovers for days, and the second pudding can be frozen immediately.
Just halve the recipe and divide the batter evenly between the dishes. The key is to grease them well so nothing sticks when inverting. 💫
Make-Ahead Serving Sauce
Prepare the custard sauce a day ahead and store it in the fridge. Simply mix 2 tablespoons custard powder with 1 cup milk and 1 tablespoon sugar, then heat gently until thickened. Keep it in a jar, and it’ll stay fresh for 3 days.
Warm it in the microwave for 30 seconds before serving—it’s the perfect topping to drizzle over warm pudding. This saves time on the big day and ensures you’re always ready for dessert. 🥛
Nutrition facts
Frequently asked questions
Can I make this pudding without suet?
Yes! For a suet-free version, replace the 1 cup suet with 1 cup coconut oil or vegetable shortening. The texture will be slightly denser but still delicious. If you're avoiding dairy entirely, use 1 cup applesauce for moisture, though the crust will be softer. The key is maintaining the same total fat content to keep the pudding rich and moist.
Why does my pudding come out dry?
Overbaking is the most common culprit—remove it when the center still has a slight wobble (40-45 minutes max at 375°F). Another reason could be too much flour or not enough fat (suet/butter). For extra moisture, add 1 tablespoon milk to the filling before baking. Always grease your dish well too—this prevents moisture loss at the edges.
What's the best way to serve this with kids?
Cut into small wedges and serve with warm vanilla ice cream or a drizzle of melted chocolate. For picky eaters, remove the crust layer and just serve the soft chocolate center—it's naturally sweet and kid-friendly. You can also make mini versions in ramekins (bake 20-25 minutes) for easy portion control. The custard sauce is another hit—just mix 2 tbsp custard powder with 1 cup milk and warm slightly.
Can I make this gluten-free?
Swap the 1 cup all-purpose flour for 1 cup gluten-free 1:1 baking flour (like Bob's Red Mill). For best texture, add 1 tsp xanthan gum to help bind the mixture. The spices and suet alternatives (like coconut oil) can stay the same. The gluten-free version might be slightly denser but still rich and flavorful. Always check your gluten-free flour blend for baking-specific formulations.
How do I know when it's perfectly done?
The perfect test is the toothpick method: insert a toothpick into the center—it should come out with moist crumbs, not wet batter. The edges should be golden brown, but the center should still have a slight jiggle. If you're unsure, err on the side of underbaking by 2-3 minutes—it'll finish cooking while resting. The pudding continues to set slightly after removal from the oven.