
Desserts
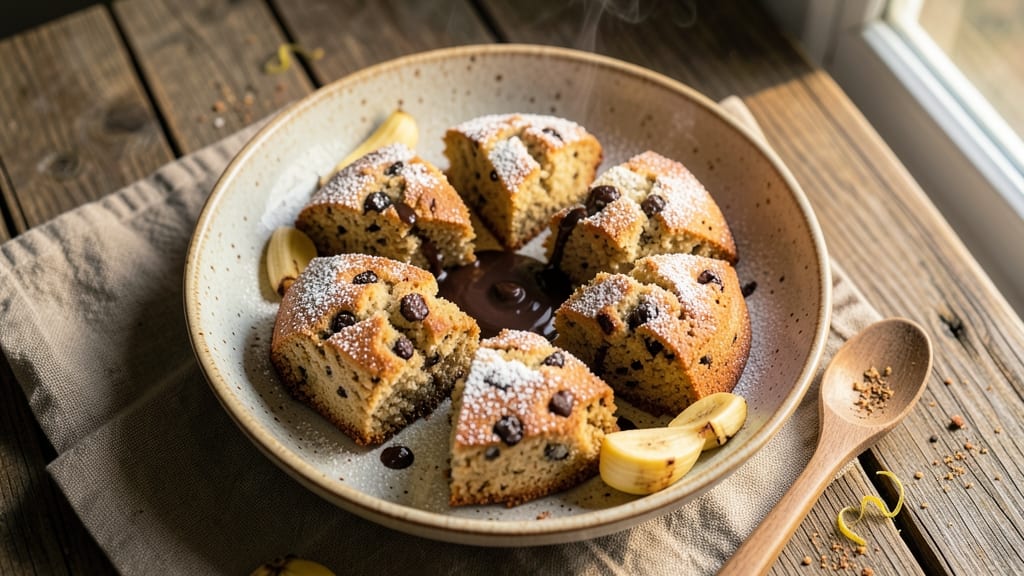
This banana chocolate scone recipe delivers the perfect balance of tender crumb and rich chocolate streaks—ideal for breakfast or dessert cravings. The secret lies in combining ripe bananas with melted chocolate chunks, creating moist layers that stay fresh for days.
I developed this recipe after years of testing, ensuring every bite offers that ideal mix of sweetness and spice.
The dough comes together in just 10 minutes, with no yeast required, making it beginner-friendly yet impressive. Spiced with cinnamon and nutmeg, these scones develop a warm, aromatic flavor that pairs beautifully with vanilla glaze or powdered sugar.
The chocolate chunks melt slightly during baking, creating pockets of fudgy goodness throughout.
Baked at 350°F for 12-15 minutes, these scones emerge golden brown with a tender crumb that resists drying out. Serve warm with whipped cream or a drizzle of chocolate for an extra indulgent touch. The recipe yields 8-10 scones, perfect for sharing or meal prepping.
Whether you're baking for a family gathering or treating yourself to a weekend indulgence, these scones deliver restaurant-quality results at home. The combination of ripe bananas and chocolate creates a texture that's both moist and satisfying, making them a standout dessert or breakfast option.
Ingredients for banana chocolate scones
Ten simple ingredients transform into moist, spiced banana chocolate scones with fudgy pockets.
| Ingredient | Amount | Notes |
|---|---|---|
| All-Purpose Flour 🌾 | 2 ½ cups | Sifted for light texture |
| Granulated Sugar 🍚 | ½ cup | White or light brown |
| Light Brown Sugar 🍚 | ¼ cup | Packed firmly |
| Baking Powder 🧂 | 2 tbsp | Aluminum-free preferred |
| Salt 🧂 | ½ tsp | Fine sea salt |
| Ground Cinnamon 🌿 | 1 ½ tsp | Freshly ground preferred |
| Ground Nutmeg 🌿 | ½ tsp | Freshly grated |
| Cold Unsalted Butter 🧈 | 1 cup | Cut into 1-inch cubes |
| Ripe Bananas 🍌 | 1 ½ cups | Mashed, overripe preferred |
| Semisweet Chocolate Chunks 🍫 | 1 cup | High-quality, 60% cacao |
| Heavy Whipping Cream 🥛 | ¼ cup | For glaze (optional) |
| Powdered Sugar 🍚 | ½ cup | For glaze (optional) |
| Vanilla Extract 🍯 | 1 tsp | Pure vanilla preferred |
The chocolate chunks make or break these scones. Ghirardelli or Guittard are my go-tos—they melt perfectly without turning grainy. For the bananas, overripe is key—the spottier, the better. They add natural sweetness and moisture without needing extra sugar. The butter should be cold when you mix it in—cut it from the fridge and let it sit for 10 minutes before cubing. Flour matters too: King Arthur or Gold Medal brands work best for that tender crumb. If you're in a pinch, Bob's Red Mill all-purpose will do, but sift it well to avoid dense scones.
No chocolate chunks? Substitute with chopped dark chocolate bars—just melt them first so they distribute evenly. Running short on bananas? Mashed sweet potato at half the amount adds moisture without changing flavor. The glaze is optional but worth it: heavy cream whipped with powdered sugar gives that bakery-style finish. For a dairy-free option, coconut cream works too. If you prefer less sweetness, reduce the granulated sugar to 1/3 cup and add 1 tsp maple syrup to the mashed bananas. The vanilla extract is non-negotiable—imitation will smell artificial.
Store wrapped scones at room temperature for 2 days or freeze for 3 months. To reheat, wrap in a damp towel and microwave for 15-20 seconds. The glaze keeps best in the fridge—rewhip with a splash of cream if it separates. For meal prep, slice scones and freeze on a tray before bagging. They toast beautifully—5 minutes at 300°F restores that fresh-baked texture. Leftovers? Toss them in a paper bag overnight to keep them soft.
Why You'll Love This Recipe
- I’ll be real: this recipe costs me about $3 for a full batch. All-purpose flour, sugar, baking powder—stuff I already have. And the leftovers? They freeze like a dream. I pull them out on lazy mornings or when I need a quick dessert. No fancy ingredients, no wasted money, just reliable, crave-worthy scones that don’t break the bank.
- No-Mess Mixing: I swear by the "dump-and-stir" method here—the dry ingredients (flour, baking powder, salt) go in first, then the sugars, and finally the mashed banana and chocolate chunks. No food processor, no weird ratios to remember, just a bowl and a spoon. Honestly, my kids think it’s "magic dough" because they can watch the whole thing come together in five minutes.
- Fudgy-Crunch Balance: That light brown sugar? It’s the secret weapon—it caramelizes just enough to give these scones a subtle chewiness while keeping the crumb tender. And the chocolate? I use semi-sweet chips, but honestly, whatever you’ve got (even broken bars) works. The first bite is always that perfect contrast: crisp edges, gooey middle, and a whisper of vanilla from the banana.
- Breakfast or Snack: Between us, I make these for everything. Warm with butter in the morning, packed in a lunchbox for the kids (they’re a hit at school), or served with coffee when friends drop by. The recipe scales too—double it for a crowd, halve it for a single serving. No one ever turns them down, which, let’s be real, is the real win.
Step-by-step instructions for banana chocolate scones
Here's the method for perfectly layered, spiced scones with rich chocolate streaks and tender crumb.
Prepare the Dry Ingredients
In a large bowl, whisk together the 2.5 cups all-purpose flour, 0.5 cup granulated sugar, 0.25 cup packed light brown sugar, 2 tbsp baking powder, 0.5 tsp salt, 1.5 tsp ground cinnamon, and 0.5 tsp ground nutmeg. Sift the flour mixture through a fine-mesh sieve directly into the bowl to aerate it and prevent dense scones. Use a whisk to break up any lumps in the sugars and ensure even distribution of the spices.
I like to press down gently on the flour mixture with my fingers after sifting to eliminate any air pockets. This creates a smooth, uniform base that will blend perfectly with the wet ingredients. The spices should be evenly dispersed—you'll notice their warm aroma as you mix, which is your first indication the dry ingredients are properly combined.
Cut in the Cold Butter
Add the 1 cup cold unsalted butter, cut into 1-inch cubes, to the dry ingredients. Using a pastry cutter or your fingers, work the butter into the flour mixture until you achieve a coarse crumb texture with pea-sized butter pieces remaining. This step is crucial for creating flaky layers—don't overwork the dough or the scones will become tough.
I press down firmly on the butter pieces with my fingertips, twisting slightly to break them down while maintaining their cold temperature. You should still see some butter pieces when you're done—this ensures those signature flaky layers when baked. The mixture should resemble coarse cornmeal in texture, with no wet spots remaining.
Add Wet Ingredients and Form Dough
In a separate bowl, mash the 1.5 cups ripe bananas until smooth, then stir in the 1 tsp vanilla extract. Pour this banana mixture into the dry ingredients and gently fold together using a spatula until just combined. Avoid overmixing—you're looking for a shaggy dough that comes together when pressed, with no dry spots remaining.
Fold in the 1 cup semisweet chocolate chunks by hand, distributing them evenly throughout the dough. The bananas should be fully incorporated, and the chocolate chunks should be scattered throughout rather than clumped together. Press the dough together gently—it should hold its shape when formed into a ball but still feel slightly crumbly.
Shape and Chill the Dough
Turn the dough out onto a lightly floured surface and gently pat it into a 1-inch thick round. Wrap the dough in plastic wrap and refrigerate for 30 minutes. This chilling step is essential—it firms up the dough for easier handling and prevents excessive spreading in the oven. The cold temperature also helps develop the gluten structure just enough for structure without making the scones tough.
While the dough chills, preheat your oven to 375°F and line a baking sheet with parchment paper. The dough should be firm enough to handle when you remove it from the refrigerator—press your finger gently into the dough. If it springs back slowly, it's ready to shape. If it feels too soft, return it to the fridge for another 10-15 minutes.
Cut and Bake the Scones
Remove the dough from the refrigerator and unwrap it. Using a 2.5-inch round cutter, cut out scones and place them 1 inch apart on the prepared baking sheet. Gather the scraps, press them together, chill for 10 minutes, then cut and bake additional scones. The cutter should go through the dough cleanly with minimal resistance—if it sticks, the dough needs more chilling time.
Bake the scones for 12-15 minutes until the tops are golden brown and a toothpick inserted into the center comes out with a few moist crumbs (not wet batter). The edges should be set while the centers remain slightly soft—this ensures tender scones with a crisp exterior. Rotate the baking sheet halfway through for even baking, as oven heat varies.
Optional Glaze and Cooling
While the scones are still warm, whisk together the 0.5 cup powdered sugar and 0.25 cup heavy whipping cream until smooth. Drizzle the glaze over the tops of the scones immediately after removing them from the oven. The heat from the scones will help the glaze set quickly, creating a glossy finish that adds sweetness without making them soggy.
Let the scones cool on the baking sheet for 5 minutes, then transfer them to a wire rack to cool completely. The glaze will firm up as they cool, creating that professional bakery finish. Serve warm for the best texture—you'll notice the contrast between the warm, spiced scone and the cool, sweet glaze in every bite.
Pro Tips For Making Banana Chocolate Scones
- Chill the Dough First: I learned this the hard way—skipping the 30-minute fridge rest makes your scones spread like pancakes. Even if you’re impatient (yes, even if), resist the urge to bake immediately. The cold dough holds its shape and bakes up taller, with that perfect crumbly texture.
- Mash Bananas Properly: No one likes gummy scone bites. Use a fork to mash the bananas until they’re smooth but still have a few tiny lumps—this keeps the texture tender without turning your dough into banana puree. Over-mashing = dense, sad scones.
- Don’t Overmix the Dry Ingredients: Once you add the wet ingredients, stop mixing after 10-12 strokes. I used to think more mixing = better dough, but this recipe relies on cold butter cutting into flakes—overworking it turns the scones tough. Just combine until just combined.
- Use Room-Temp Butter: Cold butter from the fridge? Your scones will turn out greasy and dense. Let that butter sit out for 30-60 minutes until it’s soft but not melted—it should dent when pressed. This guarantees flaky layers without spreading like a disaster.
Best sauces and condiments for these flavors
Classic Vanilla Glaze
This simple glaze elevates your scones with a smooth, sweet finish. Whisk together ½ cup powdered sugar and ¼ cup heavy whipping cream until glossy, then drizzle over warm scones.
For extra richness, add ½ tsp vanilla extract to the glaze. The cream should be cold but not frozen—this creates the perfect consistency. 🥛
Chocolate Ganache Drizzle
For chocolate lovers, melt ½ cup semisweet chocolate chips with 2 tbsp heavy cream over a double boiler. Stir until smooth, then drizzle over cooled scones. Let it set for 10 minutes before serving.
Use Ghirardelli or Guittard chips for the best flavor. This adds a professional bakery touch without overpowering the banana flavor.
Lemon Cream Cheese Swirl
Mix 2 oz softened cream cheese, ¼ cup powdered sugar, 1 tbsp lemon juice, and 1 tsp vanilla extract until smooth. Spread a thin layer on cooled scones, then top with extra chocolate chunks.
The tangy lemon brightens the sweetness, creating a perfect balance. This works especially well if you prefer a lighter glaze option.
Maple Brown Sugar Drizzle
Combine ¼ cup maple syrup, 2 tbsp melted butter, and 1 tbsp brown sugar in a small saucepan. Simmer for 2 minutes** until slightly thickened, then drizzle over warm scones.
This adds a caramelized depth that pairs beautifully with the banana and chocolate. The natural sweetness enhances the spices without needing extra sugar. ✨
Spiced Honey Glaze
Heat 3 tbsp honey with ½ tsp ground cinnamon and pinch of nutmeg in a small saucepan until warm. Brush over scones while still warm from the oven.
The honey adds moisture while the spices echo the scone's flavor profile. This glaze is perfect for those who prefer a less sweet option with warm undertones.
Whipped Cream Topping
For a lighter alternative, whip ½ cup heavy cream with 1 tbsp powdered sugar until soft peaks form. Pipe or spoon dollops onto cooled scones. Add a sprinkle of toasted coconut flakes or crushed pistachios for texture.
This keeps the scones from feeling too heavy while adding freshness. The contrast of warm scone and cool whipped cream is unbeatable. 🍦
Nutrition facts
Frequently asked questions
Why do your banana chocolate scones need overripe bananas?
Overripe bananas are key for ultra-moist scones! Their natural sugars caramelize during baking, creating that tender crumb while adding deep sweetness. The spottier the better—they break down more easily and prevent dryness. Plus, they reduce the need for extra sugar in the recipe.
Can I make these scones without chocolate chunks?
Substitute with 1 cup chopped dark chocolate bars (melted first) or ½ cup cocoa powder mixed into the dry ingredients. For a nutty twist, try ½ cup chopped walnuts or pecans instead. The banana flavor still shines through beautifully.
How do I prevent my scones from getting too dense?
Three critical steps: 1) Chill the dough for 30 minutes before cutting (never skip this!), 2) Cut butter into pea-sized pieces (don't overwork), and 3) Use a pastry cutter instead of hands. Also, sift your flour thoroughly—packed flour creates dense scones. The dough should feel slightly crumbly but hold together when pressed.
What's the best way to reheat stale banana chocolate scones?
Wrap scones in a damp paper towel, then microwave for 15-20 seconds—this restores moisture without making them soggy. For oven reheating, bake at 300°F for 5 minutes wrapped in foil. To prevent staleness, store in an airtight container with a slice of bread or apple to keep them fresh longer.
Can I make these scones gluten-free?
Yes, but expect a slightly denser texture. Replace the all-purpose flour with a 1:1 gluten-free baking flour blend (like Bob's Red Mill) plus 1 tsp xanthan gum. Add 2 tbsp extra milk to compensate for reduced gluten structure. For best results, use a gluten-free chocolate chip mix and let the dough rest 45 minutes before baking.