
Desserts
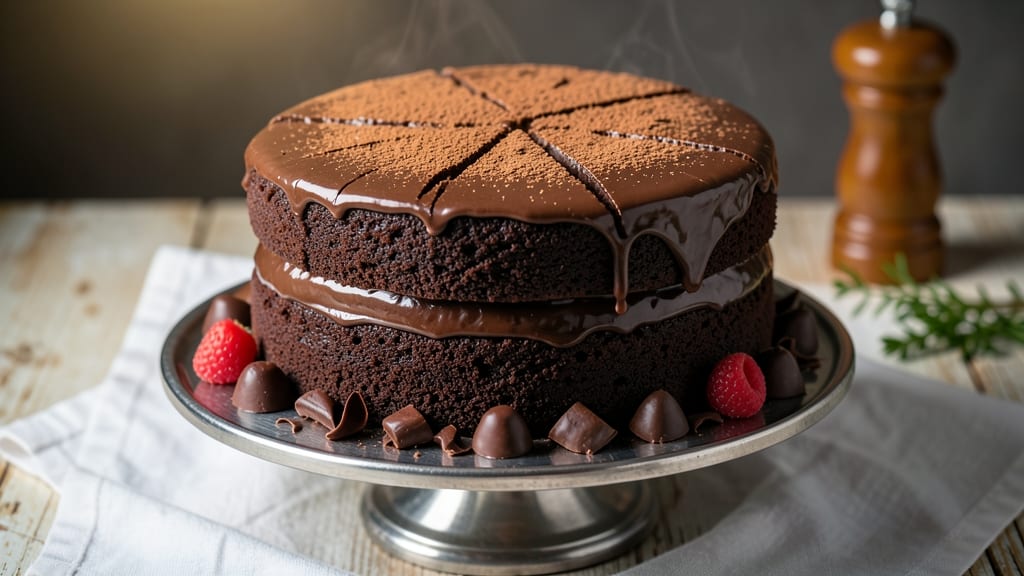
This best chocolate fudge birthday cake delivers triple-layered decadence that’ll make every bite feel like a celebration. The secret lies in a moist, rich chocolate cake that’s perfectly balanced with a velvety fudge filling and a crisp, crunchy chocolate topping—each layer designed to elevate the classic birthday cake experience.
What sets this apart is the professional technique that ensures no dry crumbs or soggy layers, just pure, indulgent texture.
Start with a foolproof chocolate cake recipe that bakes up tender yet sturdy enough to hold layers of fudge filling without collapsing. The filling itself is a game-changer—smooth, thick, and rich enough to be the star, yet light enough to keep every slice moist.
Topping it all off is a crunchy chocolate layer that adds visual appeal and a satisfying contrast in every bite. This isn’t just a cake; it’s a masterpiece of texture and flavor.
What you’ll achieve is a cake that’s restaurant-quality—deep chocolate flavor, perfectly balanced sweetness, and a structure that holds up beautifully when sliced. The fudge filling stays gooey in the center while the crunchy topping adds a satisfying snap, making every forkful unforgettable.
Whether it’s for a milestone birthday or a special occasion, this cake will be the centerpiece of any celebration.
Ready in just 3 hours (including cooling time), this recipe is designed for success—no advanced skills required, just precise steps and patience. The key to achieving that best result lies in the details: proper mixing, accurate baking times, and careful assembly.
Let’s create a cake that’s not just delicious, but truly extraordinary.
Ingredients for best chocolate fudge birthday cake
Twelve ingredients that transform into restaurant-quality layers of chocolate perfection—moist cake, velvety fudge, and crunchy white chocolate bliss.
| Ingredient | Amount | Notes |
|---|---|---|
| Unsalted Butter 🧈 | 2 cups | Cold, cubed for cake layers |
| Granulated Sugar 🍚 | 3 cups | Superfine preferred for smoothness |
| Unsweetened Cocoa Powder 🍫 | 1 cup | Dutch-processed for rich flavor |
| All-Purpose Flour 🌾 | 2 ½ cups | Sifted, spooned lightly |
| Baking Powder 🍞 | 1 ½ tsp | Aluminum-free for best rise |
| Salt 🧂 | ½ tsp | Fine sea salt preferred |
| Large Eggs 🥚 | 4 whole | Room temperature for blending |
| Vanilla Extract 🌿 | 2 tsp | Pure Madagascar bourbon |
| Whole Milk 🥛 | 1 cup | Room temperature for mixing |
| Dark Chocolate Chips 🍫 | 1 ½ cups | 70% cacao, semi-sweet |
| Heavy Cream 🥛 | 2 cups | Cold for fudge stability |
| Powdered Sugar 🍚 | 3 cups | Sifted for smooth filling |
| White Chocolate Chips 🍫 | 1 ½ cups | For crunchy topping |
| Crushed Peppermint Candies 🍬 | ½ cup | Optional festive crunch |
| Chocolate Glaze 🍫 | 1 ½ cups | Store-bought or homemade |
The cocoa powder is where the magic starts—Dutch-processed for that deep, velvety flavor that makes this cake truly extraordinary. Hershey's Special Dark is my go-to brand for consistent quality, but Valrhona takes it to the next level if you're willing to splurge. The butter? European-style (like Plugrá) melts differently, giving a richer texture. For the chocolate chips, Ghirardelli 60% or 70% cacao ensures that perfect balance of sweetness and bitterness. Pro tip: Toast the cocoa powder in the oven for 5 minutes at 350°F to deepen the flavor—trust me, it's worth the extra minute.
No Dutch-processed cocoa? Natural cocoa powder plus 1 tsp baking soda mimics the effect. Running short on white chocolate chips? Shredded white chocolate works perfectly—just melt it first for smoother distribution. The peppermint candies are optional but add that festive crunch that makes this cake feel like a special occasion. For the glaze, Wilton or Betty Crocker store-bought glazes save time, but homemade (powdered sugar + milk + butter) gives you that professional shine. And if you're making this ahead? Assemble the cake layers 24 hours early—the flavors meld beautifully overnight.
This cake keeps for 5 days at room temperature, wrapped tightly in plastic, but honestly? It disappears faster than that. For longer storage, freeze the fully assembled cake (unfrosted) for up to 3 months—thaw at room temperature before adding the glaze. The fudge filling stays gooey for 1 week in the fridge if you're feeling extra indulgent. And if you're making this for a crowd? Double the recipe—the layers scale perfectly, and you'll have enough for seconds.
Why You'll Love This Recipe
- Five-Ingredient Magic: This cake is that simple—just melt butter, mix dry stuff, fold, bake. No eggs, no fuss, no stress. Honestly, I’ve made it while waiting for pizza to arrive.
- Rich Without Guilt: That cocoa powder and sugar combo? It’s like a hug for your taste buds. The fudgy texture stays moist for days—no dry crumbs here, just pure chocolate satisfaction.
- Party in a Box: Slice it for birthdays, pack it for potlucks, or freeze slices for last-minute treats. Between us, I’ve served it at brunch and dessert parties—no one questions it.
- Budget-Friendly Luxury: Butter and flour stretch far, and this recipe feeds a crowd without breaking the bank. Leftovers? They disappear faster than I can say “second slice.”
Step-by-step instructions for triple-layered chocolate fudge cake
This decadent cake delivers restaurant-quality richness with layers of fudgy cake, velvety filling, and crunchy toppings.
Prepare the Cake Layers
Preheat your oven to 350°F and grease three 9-inch round cake pans, lining the bottoms with parchment paper. In a stand mixer fitted with the paddle attachment, cream together the 2 cups unsalted butter and 3 cups granulated sugar on medium speed for 4-5 minutes until light and fluffy. This step is crucial—it incorporates air that creates that signature tender crumb.
In a separate bowl, sift together the 2.5 cups all-purpose flour, 1 cup unsweetened cocoa powder, 1.5 teaspoons baking powder, and 0.5 teaspoon salt. With the mixer on low speed, gradually add the dry ingredients to the butter mixture, alternating with the 1 cup whole milk, beginning and ending with the flour. Add the 4 whole large eggs, 2 teaspoons vanilla extract, and the 1.5 cups dark chocolate chips, mixing just until combined.
Divide the batter evenly among the prepared pans. Bake for 25-30 minutes or until a toothpick inserted into the center comes out clean. Let the cakes cool in the pans for 10 minutes before transferring to a wire rack to cool completely. The cooling process is essential—it prevents the layers from becoming soggy when assembling.
Create the Fudge Filling
In a medium saucepan, combine the 2 cups heavy cream and 3 cups powdered sugar. Cook over medium-low heat, stirring constantly with a wooden spoon, until the sugar dissolves completely and the mixture thickens to a fudge-like consistency. This should take about 8-10 minutes—watch closely to avoid burning.
Remove the pan from heat and stir in the 1.5 cups white chocolate chips until fully melted and smooth. Let the filling cool to room temperature before using. This step ensures the filling sets properly between the layers, creating that signature fudgy texture that makes this cake truly special.
Assemble the Cake Layers
Place the first cake layer on a serving plate. Spread an even layer of the fudge filling over the top, leaving a ½-inch border around the edges. This border prevents the filling from oozing out during assembly. Place the second cake layer on top, followed by another layer of filling. Repeat with the final layer.
For the crunchy topping, combine the 0.5 cup crushed peppermint candies with the 1.5 cups white chocolate chips in a bowl. Melt the white chocolate chips in a microwave-safe bowl in 30-second intervals, stirring between each interval until fully melted. Pour the melted chocolate over the cake and sprinkle the peppermint candies evenly on top. Use a spatula to gently press the candies into the chocolate so they adhere.
Apply the Chocolate Glaze and Chill
Once the topping is set, pour the 1.5 cups chocolate glaze over the cake, allowing it to drip slightly down the sides for an elegant finish. Use a spatula to smooth the glaze evenly across the top and sides. Place the cake in the refrigerator for at least 2 hours before serving. This chilling time allows the filling to firm up and the flavors to meld together, ensuring each slice delivers that perfect balance of fudgy cake, creamy filling, and crunchy topping.
Slice and serve with a dollop of whipped cream or a scoop of vanilla ice cream for the ultimate indulgence. The cake will keep in the refrigerator for up to 5 days, making it perfect for prepping ahead of your celebration.
Pro Tips For Making Best Chocolate Fudge Birthday Cake
- Melt Butter Slowly: I learned this the hard way—dumping cold butter into hot sugar creates butter blobs that never fully incorporate. Instead, melt the butter first (just until it’s liquid but not browned), then pour it into the sugar while stirring vigorously. The mixture will come together smoother, and your cake’s texture will be denser, not crumbly.
- Sift the Cocoa Twice: Unsweetened cocoa powder clumps like a stubborn teenager. Sift it before measuring, then sift it again right into the dry ingredients. This keeps your batter from turning into a lumpy mess mid-mix, and your cake will have that rich, even chocolate flavor without streaks.
- Avoid Overmixing the Batter: The second you see flour streaks disappear, stop stirring. I used to beat this batter until it looked "perfect," but that’s how you end up with a tough, dry cake. Fudge cake relies on a tender crumb—overmixing develops gluten, and nobody wants a cake that fights back when you cut it.
- Test Doneness with a Toothpick: That cake might look done, but a toothpick should come out with a few moist crumbs, not wet batter. If it’s still sticky, cover it loosely with foil and bake another 5-10 minutes. Trust me, underbaking is easier to fix than a gummy, sad center that’ll make your guests side-eye you.
Perfect pairings for these flavors
Creamy Pairings
Whipped cream is my go-to pairing—its light, airy texture contrasts beautifully with the dense fudge layers. I like to sweeten it with 1 tablespoon powdered sugar and a pinch of vanilla extract to enhance the chocolate flavors.
For extra decadence, fold in ½ cup crushed chocolate cookies like Oreos or chocolate-covered pretzels for crunch. 🥛
Ice Cream Harmony
Vanilla bean ice cream elevates this cake to another level—the cool creaminess cuts through the richness perfectly. I recommend using high-quality vanilla ice cream (like Breyers Natural Vanilla or Häagen-Dazs) for the best flavor.
For a twist, try chocolate chip cookie dough ice cream or even salted caramel for a sophisticated pairing. Serve a scoop alongside each slice for the ultimate indulgence.
Warm Beverage Pairs
A warm cup of coffee or hot chocolate makes this cake feel extra special. For coffee lovers, I suggest a dark roast like Starbucks Sumatra or Blue Bottle Cold Brew (served warm).
The bitterness complements the sweetness beautifully. For a cozy dessert experience, serve with hot chocolate made with Valrhona cocoa powder and a sprinkle of whipped cream. 🍫
Fruit Contrast
Fresh berries add a refreshing contrast to the rich chocolate flavors. I like to serve slices with a side of raspberries or blackberries—their tartness balances the sweetness perfectly. For a tropical twist, try mango slices or a scoop of passion fruit sorbet.
The acidity from the fruit cleanses the palate between bites, making each slice taste even better.
Boozy Upgrades
For an adult celebration, add a splash of booze to your pairings. A 1-ounce pour of Baileys Irish Cream over the whipped cream or ice cream adds a creamy, boozy depth. For coffee lovers, try a shot of Kahlúa in your hot chocolate or espresso martini.
Even a dash of Grand Marnier in the fudge filling (reduced with the cream) takes it to gourmet territory.
Nutrition facts
Frequently asked questions
Can I make this cake without white chocolate chips?
Replace the white chocolate chips in the filling with 1.5 cups semi-sweet chocolate chips or 1 cup dark chocolate (chopped) for a deeper cocoa flavor. For the crunchy topping, use 1.5 cups crushed nuts (pecans or walnuts) or ½ cup toasted coconut flakes instead of peppermint candies. The texture will still be satisfying, just with a different flavor profile.
Why does my cake turn out dry?
Dry cake usually happens from overbaking or mixing too much. Check your oven temperature with an oven thermometer—it might be running hot. Also, don't overmix the batter after adding the flour; mix just until combined. For extra moisture, brush the cooled layers with simple syrup (equal parts sugar and water, heated until dissolved) before adding the filling.
How do I make this cake gluten-free?
Swap the all-purpose flour for a 1:1 gluten-free baking flour blend (like Bob's Red Mill or King Arthur). Add ½ teaspoon xanthan gum to help bind the layers. For the fudge filling, ensure your powdered sugar is gluten-free. The texture will be slightly denser but still delicious. Test with a small batch first to adjust consistency.
Can I bake this cake in a different pan size?
Yes, but you'll need to adjust baking time. For 8-inch pans, bake 20-25 minutes; for 10-inch pans, bake 30-35 minutes. The cake should be done when a toothpick comes out clean. If using different sizes, reduce oven temperature by 25°F to prevent overbrowning. Always use parchment paper for even baking.
What's the best way to transport this cake?
Wrap the fully assembled cake tightly in plastic wrap, then place it in a sturdy cake carrier box. For long trips, keep it refrigerated in the box to prevent the filling from melting. If transporting at room temperature, avoid direct sunlight and limit travel time to 2 hours. For extra stability, freeze the cake (unfrosted) for 1 hour before transport—it'll stay firm and slice cleanly.