
Desserts
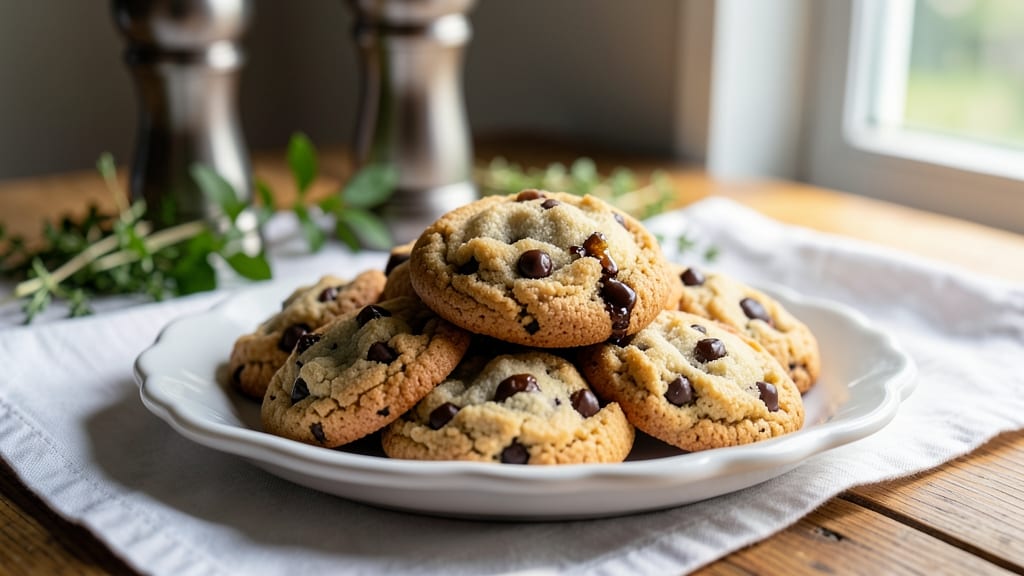
This bite-size chocolate chip cookies recipe delivers the perfect balance of crispy edges and gooey centers in every tiny bite. 💛 The secret lies in using cornstarch for extra crunch and chilling the dough properly—two small adjustments that transform ordinary cookies into irresistible pocket-sized treats.
I developed this recipe after years of perfecting the texture, ensuring each cookie is just the right size for one satisfying bite.
The process is straightforward but precise: mix the dough, chill for 30 minutes, then scoop and bake at 350°F for 10-12 minutes until golden. The combination of brown and white sugar creates caramelized flavor, while the addition of cornstarch guarantees that signature crispy texture without sacrificing the soft, chewy interior.
These cookies are perfect for parties, holiday treats, or satisfying a quick sweet craving.
What makes this recipe stand out is its foolproof method—no guesswork, no overbaking, just consistently delicious results every time. The dough is easy to handle, and the baking time is short, making it ideal for beginners and experienced bakers alike.
Once you try these bite-sized cookies, you’ll never go back to standard-sized ones again.
For added customization, you can easily swap out ingredients for vegan or gluten-free versions while keeping the same perfect texture. The recipe scales effortlessly, so you can make a single batch for personal enjoyment or double it for sharing. Let’s get baking!
Ingredients for bite size chocolate chip cookies
Nine simple ingredients, 48 perfect bites. The cornstarch and chilling secrets make all the difference!
| Ingredient | Amount | Notes |
|---|---|---|
| All-Purpose Flour 🌾 | 3 cups | Sifted for light texture |
| Granulated Sugar 🍚 | ¾ cup | White sugar for crisp edges |
| Packed Brown Sugar 🍚 | ½ cup | Light brown preferred |
| Cornstarch 🌾 | ¼ cup | Secret to crispy texture |
| Unsalted Butter 🧈 | 1 cup | Cold, cubed for even mixing |
| Large Eggs 🥚 | 1 whole | Room temperature for smooth dough |
| Vanilla Extract 🌿 | 1 tbsp | Pure vanilla for rich flavor |
| Sea Salt 🧂 | ½ tsp | Fine grain for even distribution |
| Chocolate Chips 🍫 | 1 ½ cups | Semi-sweet or milk chocolate |
| Flaky Sea Salt 🧂 | 1 tbsp | For final sprinkle on cookies |
The butter and sugars are non-negotiable for that perfect balance of crispy edges and gooey centers. Plugrá brand butter melts beautifully, but any good-quality unsalted will work. For chocolate chips, Ghirardelli semi-sweet is my go-to—they melt perfectly and stay chunky. If you're using milk chocolate, add an extra 1 minute to baking time to prevent burning. The cornstarch is the real game-changer here—it creates that irresistible crunch without drying out the cookies. Grab the Bob's Red Mill brand if you're at the store, but any food-grade cornstarch works in a pinch.
No cornstarch? Substitute with extra flour (2 tbsp), but the texture won't be quite as crispy. Out of vanilla? Almond extract works at half the amount—just be aware the flavor will be different. For chocolate chip swaps, try white chocolate chips or dark chocolate chunks for variety. If you're making these gluten-free, King Arthur gluten-free flour blend works beautifully—just reduce other dry ingredients by 10% to account for moisture differences. The dough is sensitive to humidity, so if your kitchen feels damp, chill it an extra 15 minutes before scooping.
Once mixed, the dough keeps in the fridge for up to 5 days wrapped tightly in plastic. For longer storage, freeze portions in 1-tbsp balls on a tray, then transfer to a bag—thaw at room temp before baking. These cookies reheat beautifully in the oven at 300°F for 3-5 minutes to restore that gooey center. Double the batch and freeze half for future cravings—trust me, you'll want to make these often. The flaky sea salt is optional but absolutely worth it for that gourmet touch. Sprinkle it right after pulling cookies from the oven while they're still warm.
Why You'll Love This Recipe
- No-Mess Mixing: I swear by the cornstarch trick—it keeps these tiny cookies from spreading like wildfire. Just cream the butter, toss in sugars, then fold everything into the dry stuff with a spatula. No food processor, no egg mess, just 5 minutes of hands-off magic.
- Double Chocolate Crunch: That packed brown sugar? It’s the secret weapon—caramel depth in every bite. And the melted butter? It coats the chocolate chips so they stay gooey even when the edges crisp. Honestly, I’ve tried store-bought, and these beat ‘em every time.
- Party in a Jar: Between us, these are my go-to for holiday gifts, potlucks, or when I need to feed a crowd without stress. Portion the dough into tiny balls, bake ‘em, and pack in mason jars. They last forever and disappear just as fast.
- Budget Baking Win: Five ingredients, zero specialty items, and you’re golden. The butter’s rich enough to skip oil, the sugars balance perfectly, and I’ve made 4 dozen for under $8. Freeze half—because let’s be real, you’ll bake them again.
Step-by-step instructions for bite-size chocolate chip cookies
Here's how to craft perfectly proportioned cookies with crisp edges and melty centers.
👨🍳 Step 1: Mix Dry Ingredients for Light Texture
In a medium bowl, whisk together the 3 cups all-purpose flour, 0.25 cup cornstarch, and 0.5 teaspoon sea salt until evenly combined. I sift the flour first to eliminate any lumps—this creates a lighter, more tender cookie. The cornstarch is key here; it prevents spreading while keeping the texture crisp.
Set this mixture aside while you prepare the wet ingredients. The dry ingredients should have a uniform consistency with no visible streaks of flour. If you notice any clumps, give it another quick whisk to ensure everything's perfectly blended before moving forward.
🍳 Step 2: Cream Butter and Sugars to Fluffy Perfection
In a stand mixer fitted with the paddle attachment, beat the 1 cup cold unsalted butter (cut into cubes) with the 0.75 cup granulated sugar and 0.5 cup packed brown sugar on medium speed for 3-4 minutes. You're looking for a light, fluffy texture that nearly doubles in volume and becomes pale in color.
Here's the thing—cold butter creates pockets of air that give these bite-sized cookies their signature crisp edges. If your mixture looks too soft or doesn't lighten in color, it's not ready. Keep mixing until you see that beautiful ribbon effect when you lift the paddle.
👨🍳 Step 3: Incorporate Wet Ingredients for Smooth Dough
Add the 1 whole large egg and 1 tablespoon vanilla extract to the butter-sugar mixture, mixing on low speed for 30 seconds until fully incorporated. The dough will look slightly curdled at first, but don't worry—it will come together beautifully when you add the dry ingredients.
Gradually add the dry ingredients to the wet mixture, mixing on low speed for 30-45 seconds until just combined. You should still see a few flour streaks—this ensures you don't develop too much gluten, which would make the cookies tough. The dough should be soft and slightly sticky but manageable.
🥘 Step 4: Fold in Chocolate and Chill for Structure
Remove the bowl from the mixer and gently fold in the 1.5 cups chocolate chips using a silicone spatula. Make sure they're evenly distributed throughout the dough. I like to press the chocolate chips into the dough slightly so they don't all pool at the bottom of the baking sheet.
Cover the bowl with plastic wrap and refrigerate for at least 1 hour (or up to 24 hours for even better results). Chilling the dough is non-negotiable—it solidifies the butter, prevents excessive spreading, and allows the flour to fully hydrate. This step guarantees those perfect bite-sized proportions and crisp edges.
🔥 Step 5: Bake to Golden Crispness
Preheat your oven to 350°F and line two baking sheets with parchment paper. Using a small cookie scoop or tablespoon, portion the dough into 1-teaspoon-sized balls (about the size of a marble) and place them 2 inches apart on the prepared sheets.
Bake for 10-12 minutes until the edges are golden brown but the centers still look slightly underdone. They'll continue cooking on the hot pan after you remove them from the oven. Let them cool on the baking sheet for 5 minutes before transferring to a wire rack to finish cooling.
🍽️ Step 6: Finish with Flaky Sea Salt
Once the cookies have cooled slightly, sprinkle each one with a pinch of the 1 tablespoon flaky sea salt. This final touch enhances the sweetness and adds a sophisticated crunch that balances the gooey chocolate centers.
Serve warm for the ultimate experience—these bite-sized cookies are perfect for parties, picnics, or just satisfying a quick craving. The combination of crisp edges, chewy centers, and melty chocolate makes every tiny bite unforgettable.
Pro Tips For Making Bite Size Chocolate Chip Cookies
- Chill the Dough First: I learned this the hard way—skipping the 30-minute fridge rest means your tiny cookies spread into sad, flat pancakes. Even if you’re impatient (yes, even if), let that dough firm up before scooping.
- Use Room-Temp Butter: Cold butter = tough cookies. Let that block sit out for 30-60 minutes until it’s soft but not greasy—just pressable with a finger. This keeps your bite-sized cookies tender without turning them into goo.
- Scoop Small, Uniform Balls: Pack those dough scoops too tight, and your cookies bake unevenly. Use a cookie scoop or spoon to portion ½-inch balls—no bigger, no smaller. Pro tip: Roll them gently in your palm to smooth edges before baking.
- Bake in Two Batches: Crowd the tray, and your cookies steam instead of crisp. Spread them 2 inches apart on a single sheet, and bake just one batch at a time. Trust me, 10 minutes extra in the oven is better than 20 minutes of waiting for the pan to cool.
Pro cooking tips for this recipe
Perfect Scooping Technique
Use a 1-teaspoon cookie scoop or a small ice cream scoop for consistent marble-sized portions. I find the OXO Good Grips 1-tsp scoop works perfectly—it gives you clean, uniform balls every time. If you don't have a scoop, use a tablespoon and roll the dough into balls between your palms.
Keep them 2 inches apart on the baking sheet to prevent spreading during baking. 🍪
Dough Chilling Secrets
Chill the dough for at least 1 hour (up to 24 hours for best results) to prevent spreading and enhance flavor development. I like to flatten each dough ball slightly before baking—this creates a larger surface area for browning while keeping the center gooey.
If your kitchen feels humid, chill the dough an extra 15 minutes to help it hold its shape better. The butter needs this time to firm up properly.
Oven Temperature Tips
Preheat your oven to 350°F and use the middle rack for even heat distribution. I recommend baking on parchment paper to prevent sticking and ensure crisp edges. If your oven runs hot, reduce the temperature to 340°F to prevent over-browning.
For convection ovens, reduce baking time by 1-2 minutes since they circulate air more efficiently. Always rotate the baking sheets halfway through for even cooking.
Baking Time Mastery
Bake for 10-12 minutes until the edges are golden brown but the centers still look slightly underdone. The cookies will continue cooking on the hot pan after removal. For extra crisp edges, I sometimes finish them under the broiler for 30 seconds after baking.
Watch them closely—they can go from perfect to burnt in seconds! Let them cool on the baking sheet for 5 minutes before transferring to a wire rack to prevent over-crisping.
Chocolate Chip Placement
Distribute the chocolate chips evenly throughout the dough by gently pressing them in with a silicone spatula. For extra melty pockets, I like to place 2-3 chips in the center of each dough ball before baking.
If you're using chocolate chunks instead of chips, chop them into ½-inch pieces for better melting. Avoid overmixing after adding chocolate—just fold until incorporated to maintain the tender texture. 🍫
Post-Bake Finishing
Sprinkle with flaky sea salt immediately after baking while the cookies are still warm for that gourmet touch. I use Maldon sea salt because its large flakes melt beautifully. For added texture, press a few extra chocolate chips into the tops of the cookies before they cool completely.
Store in an airtight container at room temperature for up to 5 days—they'll stay fresh longer than standard-sized cookies. Reheat in a 300°F oven for 3-5 minutes to restore that gooey center.
Nutrition facts
Frequently asked questions
Why does this recipe use cornstarch instead of extra flour?
The 0.25 cup cornstarch creates that signature crispy texture while preventing the cookies from becoming too dense. Unlike flour, it doesn't develop gluten when mixed, so your bite-sized treats stay tender inside with perfectly crisp edges. Think of it as the secret weapon for achieving that irresistible crunch!
Can I make these cookies gluten-free or vegan?
For gluten-free, swap the all-purpose flour with a 1:1 gluten-free blend (like King Arthur's) and reduce other dry ingredients by 10% to account for moisture differences. For vegan cookies, use vegan butter and flax eggs (1 tbsp ground flaxseed + 3 tbsp water per egg). The texture remains perfect with these adjustments!
How do I prevent the cookies from spreading too much?
Chilling the dough for at least 1 hour (or up to 24 hours) is key—it firms up the butter and prevents excessive spreading. Also, scoop the dough into 1-teaspoon balls and flatten them slightly before baking. This creates a larger surface area for browning while maintaining that perfect bite-sized shape.
What's the best way to store these bite-sized cookies?
Store them in an airtight container at room temperature for up to 5 days. For longer storage, freeze the dough balls (before baking) for up to 3 months300°F oven for 3-5 minutes to restore that gooey center. They stay fresher longer than standard-sized cookies!
Can I use milk chocolate chips instead of semi-sweet?
Yes, but bake them for 1 extra minute since milk chocolate melts faster. For the best results, use a mix of both—1 cup semi-sweet + 0.5 cup milk chocolate gives you balanced sweetness and rich flavor. The texture remains perfect either way!