
Desserts
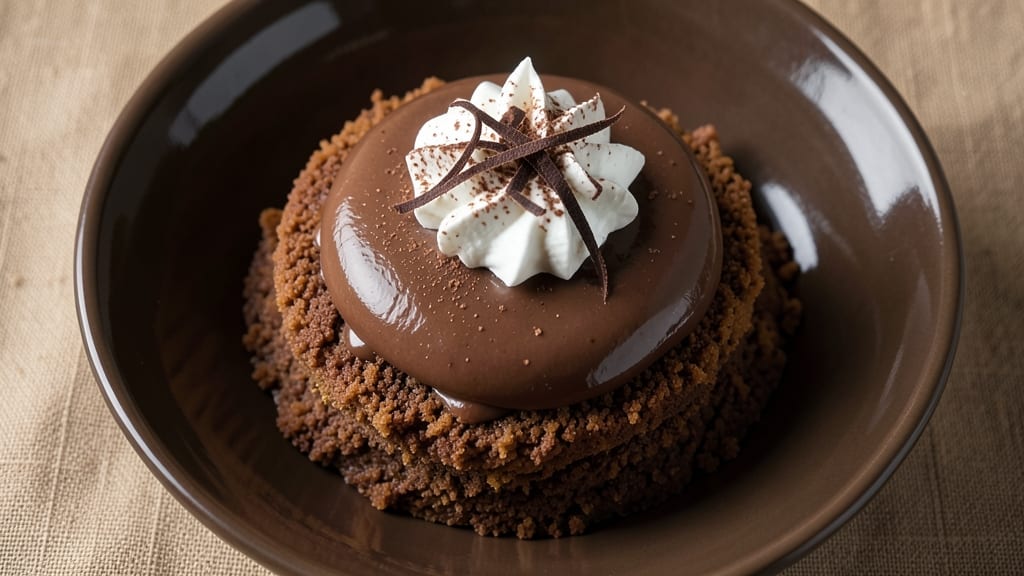
This box chocolate cake recipe with pudding transforms a simple box mix into a restaurant-worthy dessert with just a few extra steps. The secret lies in the velvety vanilla pudding layers that cut through the rich cocoa, creating a texture that's both light and decadent.
I've perfected this technique after years of testing—it's the kind of dessert that disappears faster than you can say "second slice."
The beauty of this recipe is its simplicity: you start with a standard box mix, but the pudding layer elevates it to something extraordinary. No fancy equipment is needed—just a few mixing bowls and patience for chilling.
The pudding soaks into the cake just enough to keep it moist without turning soggy, while the chocolate layers remain rich and fudgy.
What you'll end up with is a three-layer cake that's perfectly balanced—dense chocolate cake with silky pudding filling between each layer. The contrast of flavors and textures makes every bite unforgettable, and the optional whipped cream or chocolate shavings add that final touch of elegance.
This dessert is foolproof yet feels special enough for celebrations.
Whether you're hosting a dinner party or just craving a decadent treat, this recipe delivers restaurant-quality results with minimal effort. The best part? You can customize it with your favorite mix-ins or garnishes, making it as simple or as indulgent as you like. Let's get baking!
Ingredients for box chocolate cake recipe with pudding
Twelve simple ingredients transform a box mix into a restaurant-worthy three-layer cake with velvety pudding layers.
| Ingredient | Amount | Notes |
|---|---|---|
| Boxed Chocolate Cake Mix 🍫 | 1 box | High-quality brand preferred |
| All-Purpose Flour 🌾 | ½ cup | For stabilizing cake layers |
| Unsalted Butter 🧈 | 1 cup | Softened, full-fat preferred |
| Granulated Sugar 🍚 | ½ cup | For extra richness |
| Large Eggs 🥚 | 2 whole | Room temperature for blending |
| Milk 🥛 | 1 cup | Whole milk preferred |
| Vanilla Extract 🌿 | 1 tbsp | Pure, high-quality extract |
| Instant Vanilla Pudding Mix 🍮 | 3 boxes | Vanilla flavor preferred |
| Milk 🥛 | 3 cups | For pudding mix (whole milk) |
| Heavy Whipping Cream 🧈 | 2 cups | Cold, full-fat for whipping |
| Powdered Sugar 🍚 | 2 tbsp | For whipped cream |
| Chocolate Shavings 🍫 | ½ cup | Dark chocolate preferred |
| Vegetable Oil 🫒 | ½ cup | For greasing pans |
| Unsweetened Cocoa Powder 🍫 | 2 tbsp | For dusting layers |
The boxed cake mix is your foundation, but quality matters here. Betty Crocker or Duncan Hines mixes work best—they're formulated for consistent results. For the pudding, Jell-O brand is the gold standard, but any instant vanilla mix will do. The butter should be full-fat and unsalted—none of that low-fat nonsense, or the cake will crumble. I always grab Land O'Lakes butter from the grocery store's dairy section—it's reliable and affordable. The chocolate shavings? Ghirardelli or Lindt make the best, but a good-quality dark chocolate bar will work too if you've got one at home.
No instant pudding mix? Make your own with cornstarch, sugar, and vanilla—it's easier than you think. Running low on heavy cream? Whipped coconut cream works in a pinch, though it won't be as rich. The cocoa powder can be swapped for melted dark chocolate if you're feeling fancy, but it'll add extra moisture. For the cake layers, room-temperature eggs blend smoother—just pop them out of the fridge 30 minutes before mixing. The pudding should be thick but pourable—if it's too stiff, add a splash more milk. And trust me, the extra flour and sugar in the cake batter make all the difference for those perfect layers.
This cake needs patience—chill each layer for 20 minutes before adding the pudding, then refrigerate the whole thing for at least 4 hours (overnight is best). The pudding will soak into the cake just enough to keep it moist without turning soggy. Store leftovers in the fridge for up to 5 days, covered tightly. The whipped cream can be made ahead and stored in an airtight container for up to 2 days, but whip it fresh if you can—it makes a difference. For serving, I like to dust the layers with cocoa powder and add fresh berries for a pop of color.
Why You'll Love This Recipe
- Pantry Magic: I swear by this combo—just crack eggs, melt butter, and pour. No measuring cups out, no extra ingredients cluttering my fridge. The box mix handles 90% of the work while I sip coffee and pretend I’m not baking.
- Rich Twist: That extra pudding swirled in? It turns ordinary cake into something decadent without the fuss. The butter and sugar in the mix caramelize just enough to make every bite feel like a treat, not just dessert.
- Double Duty: Birthday? Check. Potluck? Done. Even my kids’ school bake sale loved it—I wrapped slices in foil for easy transport. The pudding layer keeps it moist for days, so it’s just as good cold as it is warm.
- Budget Bake: Five ingredients, zero waste. The box mix cuts costs, and the flour/butter/eggs stretch further than I expected. I’ve made this for 12 people for under $15—leftovers? They vanish faster than I can reheat them.
Step-by-step instructions for box chocolate cake with pudding layers
Here's how to create decadent layers of moist chocolate cake and velvety vanilla pudding that'll impress everyone.
Prepare the Chocolate Cake Layers
Preheat your oven to 350°F and grease two 9-inch round cake pans with the 0.5 cup vegetable oil, then dust lightly with 2 tbsp unsweetened cocoa powder. Line the bottoms with parchment circles for easy removal. In a large mixing bowl, combine the 1 box boxed chocolate cake mix, 0.5 cup all-purpose flour, 0.5 cup granulated sugar, 2 whole large eggs, 1 cup milk, and 1 tbsp vanilla extract.
Using an electric mixer on medium speed, beat everything together for 2 minutes until smooth and fully incorporated. The batter should be thick but pourable—if it's too thick, add 1-2 tablespoons milk to reach the right consistency. Divide the batter evenly between the prepared pans and smooth the tops with a spatula. Bake for 25-30 minutes or until a toothpick inserted in the center comes out clean with just a few moist crumbs.
Make the Vanilla Pudding Filling
While the cake bakes, prepare the pudding filling by combining 3 boxes instant vanilla pudding mix with 3 cups milk in a medium bowl. Whisk vigorously for 2 minutes until completely smooth and thickened. The mixture should coat the back of a spoon and hold its shape when dropped from a spoon—this indicates proper thickening. Pour the pudding into a shallow dish and refrigerate for at least 1 hour until fully set.
Here's the thing—this pudding needs to be perfectly chilled before assembly. If you rush it, the layers won't hold together properly. For extra richness, you could even fold in 1 tablespoon whipped cream at the end, but keep it smooth to maintain that silky texture.
Prepare the Whipped Cream Topping
In a chilled mixing bowl, combine the 2 cups heavy whipping cream and 2 tbsp powdered sugar. Using a hand mixer or stand mixer, whip on medium-high speed until soft peaks form. Increase the speed to high and continue whipping until stiff peaks form—you should be able to lift the beaters and have the cream hold its shape. This usually takes about 3-4 minutes total.
For the best texture, make sure your mixing bowl and beaters are completely cold before starting. If the cream starts to curdle or doesn't whip properly, it's likely because the cream was too warm. The whipped cream should be thick enough to hold its shape when spooned but still light enough to spread easily between layers.
Assemble the Cake Layers
Allow the baked cake layers to cool completely in their pans for 10 minutes, then transfer to a wire rack to cool completely. Once cooled, level the tops if needed with a serrated knife. Place the first cake layer on a serving plate, then spread about 1/3 of the chilled pudding evenly over the top. Be generous but not so much that it spills over the edges.
Top with the second cake layer and repeat the process, spreading another 1/3 of the pudding on top. Finally, spread the remaining pudding over the top layer, creating a smooth surface. This layering technique creates that signature "wow" factor with each bite combining cake, pudding, and cream.
Add Final Touches and Serve
Spread the whipped cream evenly over the top layer of pudding, creating a smooth surface. Use a spatula to create decorative swirls if desired. Immediately sprinkle the 0.5 cup chocolate shavings evenly over the top while the whipped cream is still soft enough to adhere. This final step adds both visual appeal and that rich chocolate flavor in every bite.
Let the cake sit at room temperature for 10 minutes before slicing to allow the layers to fully meld together. Serve immediately while the whipped cream is still light and fluffy. For best results, refrigerate any leftovers for up to 2 days, but I promise it won't last that long!
Pro Tips For Making Box Chocolate Cake Recipe With Pudding
- MELT THE BUTTER FIRST: Don’t just toss cold butter into the mix—melt it first and let it cool slightly. The boxed mix handles warm butter better, and you’ll avoid lumps that make the batter uneven. I learned this the hard way when my cake turned out greasy and dense.
- WHISK THE EGGS VIGOROUSLY: Beat those eggs until they’re pale and slightly foamy before mixing. The boxed cake mix relies on air for lift, and under-whisked eggs mean a flatter, heavier cake. Skip this step, and you’ll regret it when the middle stays dense.
- DON’T OVERMIX THE BATTER: Stir just until the dry ingredients disappear—maybe 10-12 strokes max. Overmixing develops gluten, turning your cake into a tough, chewy brick. I used to go overboard, thinking more mixing = better texture. It doesn’t.
- ADD PUDDING MIX TO DRY INGREDIENTS: Instead of mixing the instant pudding into the wet batter, fold it into the dry cake mix first. This keeps the pudding evenly distributed and prevents clumps in the final cake. Sounds weird, but it works—trust me.
Essential equipment for this recipe
Mixing Bowls
You'll need at least three mixing bowls—one for the cake batter, one for the pudding, and one for the whipped cream. I recommend using stainless steel or glass bowls because they keep ingredients cooler during mixing.
A large 5-quart bowl works great for the cake batter, while medium 3-quart bowls are perfect for the pudding and whipped cream. Pro tip: Use bowls with non-slip bases to prevent accidents when whisking or beating. 🥄
Electric Mixer
An electric mixer is a game-changer for this recipe. A hand mixer works in a pinch, but a stand mixer (like a KitchenAid Artisan) gives you more power and consistency, especially for the whipped cream.
If you're using a hand mixer, make sure it has beaters for whipping cream and a whisk attachment for the pudding. Avoid using plastic beaters—they can melt if the cream gets too warm. 💫
Cake Pans
You'll need two 9-inch round cake pans with removable bottoms or parchment-lined pans for easy release. I prefer non-stick pans to avoid greasing, but if you use them, still grease lightly with vegetable oil and dust with cocoa powder.
For even baking, choose pans with flat, heavy bottoms—they distribute heat better. If you don’t have round pans, square or rectangular pans (8x8-inch) will work, but the layers won’t look as elegant. 🍫
Parchment Paper
Line the bottoms of your cake pans with parchment circles to prevent sticking and make removal effortless. Cut circles slightly larger than the pan diameter and trim excess after baking.
If you don’t have parchment, grease the pans thoroughly with vegetable oil and dust with cocoa powder. Avoid using butter—it can burn and leave a bitter taste. 🧾
Spatulas
Invest in a flexible silicone spatula (like OXO Good Grips) for spreading pudding and whipped cream between layers. A straight-edged offset spatula helps level the cake batter and smooth the tops.
For serving, a long, thin spatula makes it easy to cut clean slices without tearing the layers. Keep one spatula just for cake to avoid cross-contamination with other desserts. ✨
Measuring Tools
Precision matters in baking, so use liquid measuring cups for milk and oil, and a dry measuring cup with a leveling tool for flour and sugar. A digital kitchen scale is ideal for accurate measurements, especially for the pudding mix.
For small amounts like vanilla extract, a medicine dropper or small squeeze bottle ensures you don’t overdo it. Pro tip: Measure your dry ingredients by weight if possible—it’s more consistent than volume. 📏
Nutrition facts
Frequently asked questions
Can I use a different flavor pudding instead of vanilla?
While vanilla is traditional, you can experiment with flavors like chocolate, coffee, or even caramel! Just ensure the pudding is fully chilled before assembling to maintain the cake's structure. For chocolate pudding, reduce the cake batter slightly to balance the richness.
How do I prevent the cake layers from getting soggy?
Chill each cake layer for 20 minutes before adding pudding, then refrigerate the entire cake for at least 4 hours (overnight is best). The cold pudding soaks just enough to keep the cake moist without making it soggy. For extra insurance, brush layers with simple syrup before adding pudding.
What if I don't have a stand mixer for the whipped cream?
No problem! Use a hand mixer or even a whisk and strong arm. Chill your bowl and beaters first, and whip the cream on high speed for 3-4 minutes until stiff peaks form. If the cream doesn't whip, it may be too warm—try placing the bowl in the freezer for 5 minutes before starting.
Can I make this cake ahead of time?
Assemble the entire cake (including whipped cream) 1 day ahead and refrigerate. The flavors meld beautifully overnight. For serving, let it sit at room temperature for 30 minutes before slicing to soften the whipped cream slightly. Store leftovers in the fridge for up to 5 days.
What's the best way to level uneven cake layers?
Use a serrated knife or cake leveler to trim the tops. Place a long ruler on the cake layer, then gently drag the knife along the ruler's edge. For extra precision, use a laser level or even a straight piece of spaghetti as a guide. Leveling ensures even pudding distribution and a professional finish.