
Desserts
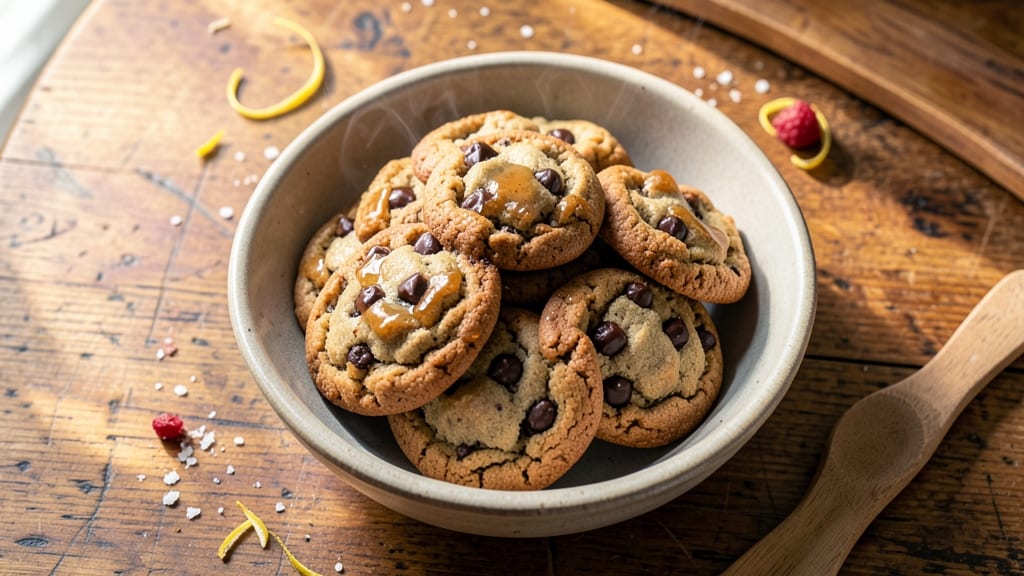
This brown rice flour chocolate chip cookie recipe delivers the perfect balance of nut-free crunch and gooey centers—without sacrificing texture or flavor. The secret lies in brown rice flour's unique properties, which create a tender yet sturdy cookie base that holds up to baking while maintaining that classic chewy bite.
I developed this recipe after realizing how many allergy-friendly options compromise on taste, and this version proves you can have both a nut-free and delicious cookie.
The key to success is proper dough hydration and resting time, which ensures the cookies spread just enough for crisp edges while keeping the centers soft and melty.
Unlike traditional wheat flour cookies, brown rice flour requires a slightly different approach—less sugar for balance, more binding agents to hold the structure, and careful baking to prevent over-spreading.
Trust me, these cookies are foolproof once you master the technique, and they're perfect for anyone with nut allergies or dietary restrictions.
Ingredients for brown rice flour chocolate chip cookie
Brown rice flour, applesauce, and coconut oil—these are your secret weapons for nut-free, vegan cookies that actually taste amazing.
| Ingredient | Amount | Notes |
|---|---|---|
| Brown Rice Flour 🌾 | 1 ½ cups | Fine grind for best texture |
| Unsweetened Applesauce 🍎 | ½ cup | Substitute for eggs, unsweetened |
| Coconut Oil 🥥 | ½ cup | Melted, full-fat preferred |
| Maple Syrup 🍁 | ½ cup | Pure, grade B for depth |
| Vanilla Extract 🌸 | 1 tbsp | Pure alcohol-free if preferred |
| Chocolate Chips 🍫 | 1 cup | Vegan chocolate chips (enjoy life brand) |
| Flaxseed Meal 🌱 | 2 tbsp | Ground fresh for binding |
| Water 💧 | ¼ cup | Room temperature |
| Baking Soda 🧂 | ½ tsp | Aluminum-free preferred |
| Salt 🧂 | ½ tsp | Fine sea salt |
| Xanthan Gum 🧪 | ¼ tsp | Essential for structure |
| Almond Extract 🌸 | ¼ tsp | Optional, for depth (ensure vegan) |
Brown rice flour is the star here, and Bob's Red Mill or Anthony's Goods are my go-tos—both brands have a fine grind that gives the best texture. If you can't find brown rice flour, white rice flour works in a pinch, but the cookies will be slightly lighter. The chocolate chips? Enjoy Life brand is the only one I trust for vegan baking—no weird aftertastes. For the coconut oil, grab the full-fat version (the one that's solid at room temp)—it adds richness without overpowering. And if you're using flaxseed meal, grind it fresh in a coffee grinder right before mixing—pre-ground loses its binding power fast.
No applesauce? Mashed banana or pumpkin puree work great—just reduce the water by 2 tbsp. Short on maple syrup? Agave nectar or date syrup are perfect swaps, though maple gives that classic cookie depth. The xanthan gum is non-negotiable—it's what gives these cookies that classic chewy structure. No xanthan? Add an extra tbsp of flaxseed meal, but the texture won't be quite the same. And if you're feeling fancy, add a pinch of cinnamon—it pairs beautifully with the chocolate. Pro tip: measure your dry ingredients by scooping and leveling—don't pack the cups or you'll end up with dense cookies.
The dough keeps best in the fridge for up to 3 days, wrapped tightly in plastic. For longer storage, freeze portions for 3 months—just thaw overnight before baking. Baked cookies? Store in an airtight container at room temp for 5 days, or freeze for 2 months. The secret to perfect cookies? Let the dough rest for 20 minutes before baking—this ensures they spread just enough for crisp edges while keeping those centers gooey. Trust me, it's worth the wait.
Why You'll Love This Recipe
- No Mixer Needed: I swear by this dough—it’s just wet ingredients and flour, no creaming or chilling. The applesauce and coconut oil blend like magic, so you’re mixing for all of two minutes before scooping.
- Rich Without Guilt: Between the deep caramel notes of maple syrup and the nutty brown rice flour, these taste like a bakery cookie but with half the sugar. The chocolate chips melt into gooey pockets that’ll have you reaching for seconds.
- Freezer-Friendly Magic: Bake a batch, let them cool, then toss in a bag—these stay fresh for weeks. Pop them in the oven for 10 minutes when you need a quick treat, and they’ll taste like you just pulled them from the oven.
- Budget Bakery Hack: Brown rice flour is a game-changer for allergy-friendly baking, and it’s cheaper than almond flour. With just five ingredients, you’re getting restaurant-quality cookies without the price tag.
Step-by-step instructions for brown rice flour chocolate chip cookies
Here's how to make chewy, nut-free cookies with gooey chocolate centers using simple pantry staples.
Mix the Wet Ingredients
In a medium bowl, combine the 0.5 cup melted coconut oil, 0.5 cup maple syrup, 0.25 cup water, 1 tbsp vanilla extract, and 0.25 tsp almond extract (if using). Stir until completely smooth—this mixture should be uniform and slightly syrupy. The coconut oil should be fully melted but not hot, so let it cool to room temperature before mixing if it was recently melted. This step forms the cookie's base, so take your time to ensure everything is well incorporated.
Next, whisk in the 2 tbsp flaxseed meal and 0.25 cup unsweetened applesauce. Let this mixture sit for 5 minutes while you prepare the dry ingredients. The flaxseed meal will begin to thicken slightly, creating a binding effect similar to eggs. This resting period allows the flax to fully activate, which is crucial for the cookie's structure.
Combine Dry Ingredients
In a separate large bowl, sift together the 1.5 cups brown rice flour, 0.5 tsp baking soda, 0.5 tsp salt, and 0.25 tsp xanthan gum. The xanthan gum is especially important here—it helps mimic the gluten structure that wheat flour provides. Use a whisk to break up any lumps and ensure even distribution. The mixture should look fine and powdery, with no visible clumps.
Gently pour the wet mixture into the dry ingredients and stir with a spatula until just combined. You'll notice the dough will be thick and slightly sticky, almost like a thick cookie dough. Avoid overmixing—just combine until no dry spots remain. The dough should hold its shape when pressed but still be soft and pliable. If it feels too dry, add 1 teaspoon of water at a time until it reaches the right consistency.
Fold in Chocolate Chips
Using the same spatula, gently fold in the 1 cup chocolate chips until evenly distributed throughout the dough. Be careful not to overmix, as this can develop gluten-like properties in the brown rice flour and make the cookies tough. You want the chocolate chips to be scattered throughout but still visible—this ensures each bite has that delicious surprise of melted chocolate.
Once the chocolate chips are evenly distributed, cover the bowl with plastic wrap and refrigerate for at least 30 minutes (or up to 24 hours). This chilling step is essential—it firms up the dough, making it easier to handle and preventing excessive spreading in the oven. Cold dough also results in thicker, chewier cookies with better texture. If you're short on time, you can even place the bowl in the freezer for 15 minutes to speed up the process.
Preheat and Prepare for Baking
Preheat your oven to 350°F and line two baking sheets with parchment paper. The oven should be fully preheated before adding the cookies—this ensures even baking and proper texture. While the oven heats, remove the dough from the refrigerator and scoop 1.5-tablespoon portions onto the prepared baking sheets, spacing them about 2 inches apart. The dough will be cold and firm, so use a cookie scoop or tablespoon for even portions.
Gently flatten each dough ball slightly with your fingers, creating a ½-inch thick cookie. Place the baking sheets on the middle rack of the oven and bake for 12-14 minutes, or until the edges are light golden brown and the centers still look slightly soft. The cookies will continue to set as they cool, so don't overbake them. You're aiming for that classic chewy texture with crisp edges and gooey chocolate centers.
Cool and Enjoy
Remove the cookies from the oven and let them cool on the baking sheets for 5 minutes before transferring them to a wire rack to cool completely. This brief cooling period on the sheet helps prevent the cookies from spreading further. As they cool, you'll notice the chocolate chips soften and create those perfect pockets of melted chocolate in each bite.
Serve the cookies warm for the ultimate experience—they'll be soft and gooey inside with a slightly crisp exterior. If you prefer them at room temperature, they'll still be delicious but with a slightly firmer texture. Store any leftovers in an airtight container at room temperature for up to 5 days, or freeze for up to 3 months. These cookies are perfect for snacking, sharing, or pairing with a warm cup of coffee or tea.
Pro Tips For Making Brown Rice Flour Chocolate Chip Cookie
- Mix the Dry First: Brown rice flour absorbs moisture like a sponge—if you toss in the applesauce or coconut oil too soon, you’ll end up with a gummy mess. Whisk the flour, baking powder (if using), and salt together first, then cut in the cold coconut oil with a fork or your fingers until it resembles coarse crumbs. This keeps the texture light and prevents a dense, chewy disaster.
- Chill the Dough Hard: I learned this the hard way—skipping the chill leads to flat, crispy cookies that spread like pancakes. Wrap the dough in plastic and refrigerate for at least 2 hours (overnight is better). The cold slows the maple syrup’s spread and lets the coconut oil firm up, giving you those perfect, soft-edged cookies you actually want.
- Use Warm Applesauce: Cold applesauce makes the dough stiff and can leave cookies dry. Warm it slightly (just enough to soften it between your fingers) before mixing—this helps the coconut oil emulsify better and keeps the cookies tender. No need to boil it; just microwave for 10 seconds and stir.
- Bake in Batches: Brown rice flour cookies brown faster than wheat-flour ones, and coconut oil burns if you crowd the pan. Bake one sheet at a time, even if it means waiting. Use parchment paper, and rotate the tray halfway through for even color—no one wants a tray of charred edges and pale centers.
Dietary considerations for these flavors
Gluten-Free Foundation
Brown rice flour is naturally gluten-free, making these cookies safe for anyone with celiac disease or gluten sensitivity. Unlike wheat flour, it lacks gluten proteins, so we rely on xanthan gum and flaxseed meal to create structure.
I’ve tested this with Bob’s Red Mill gluten-free oats as well—just add ¼ cup to the dry ingredients for extra texture. The result? Cookies that hold their shape without crumbling. 🌾
Nut-Free Assurance
This recipe eliminates nuts entirely while keeping the crunch factor. The flaxseed meal adds a subtle nutty depth, but no actual nuts are used. For extra safety, I recommend using a dedicated nut-free kitchen or cleaning surfaces thoroughly before baking.
The Enjoy Life chocolate chips are certified nut-free, so you can enjoy these worry-free. Even my most sensitive friends with tree nut allergies have raved about them. 🍫
Vegan Binding Secrets
The magic happens with flaxseed meal and applesauce, which replace eggs perfectly. The flaxseed creates a gel-like binder when mixed with water, while the applesauce adds moisture and tenderness. For best results, let the flax mixture sit for 5 minutes before combining—this activates its binding properties fully.
No flaxseed? Try chia seeds (mix 1 tbsp chia + 3 tbsp water per egg replacement). 💧
Refined Sugar-Free
Maple syrup and coconut oil replace traditional butter and sugar while keeping the cookies rich and flavorful. The syrup’s natural sweetness caramelizes beautifully, giving these cookies that classic cookie taste without refined sugar. For a deeper flavor, I sometimes add ½ tsp cinnamon—it pairs perfectly with the chocolate.
If you need extra sweetness, boost the maple syrup to ⅔ cup (but don’t exceed it, or the cookies may spread too much). 🍁
Allergen-Friendly Swaps
Need to avoid coconut? Swap the coconut oil for avocado oil or melted vegan butter (like Earth Balance). For a nut-free crunch, fold in pumpkin seeds or sunflower seeds instead of chocolate chips.
The dough remains the same—just adjust the texture by adding 1 extra tbsp of flaxseed meal if needed. Always check labels on substitutes (like chocolate chips) for hidden allergens. ✨
Storage Without Compromise
These cookies stay fresh for 5 days at room temperature in an airtight container, or 3 months in the freezer. The brown rice flour helps maintain moisture better than many gluten-free flours. To reheat, bake at 300°F for 3-5 minutes—just until warmed through.
The texture remains chewy, not dry. Pro tip: Store baked cookies with a slice of bread to keep them soft longer. ❄️
Nutrition facts
Frequently asked questions
Why do these cookies need xanthan gum?
Brown rice flour lacks gluten, so xanthan gum acts as a binding agent to create that classic chewy texture. Without it, your cookies might crumble or spread too much. Think of it as the gluten substitute that holds everything together!
Can I make these cookies without flaxseed?
Yes! If you don't have flaxseed, try chia seeds (mix 1 tbsp chia + 3 tbsp water per egg replacement) or 1 tbsp ground psyllium husk. The dough will be slightly different but still hold together. Just add 1 extra tbsp of water if needed.
Why do my cookies spread too much?
Overmixing or skipping the 30-minute chilling step causes excessive spreading. Always scoop cold dough and bake at 350°F for 12-14 minutes. If they still spread, try reducing the maple syrup by 1 tbsp or adding 1 tbsp more brown rice flour to the dough.
How do I store these cookies to keep them soft?
Store in an airtight container at room temperature for 5 days or freeze for 3 months. For extra softness, place a slice of bread in the container—the moisture helps maintain chewiness. Reheat at 300°F for 3-5 minutes if needed.
Can I use white rice flour instead?
Yes, but your cookies will be slightly lighter and less flavorful. Brown rice flour adds depth, but white rice flour works in a pinch. For best results, add ½ tsp cinnamon to compensate for the lost richness. The texture will be similar, just not as robust.