
Beverages
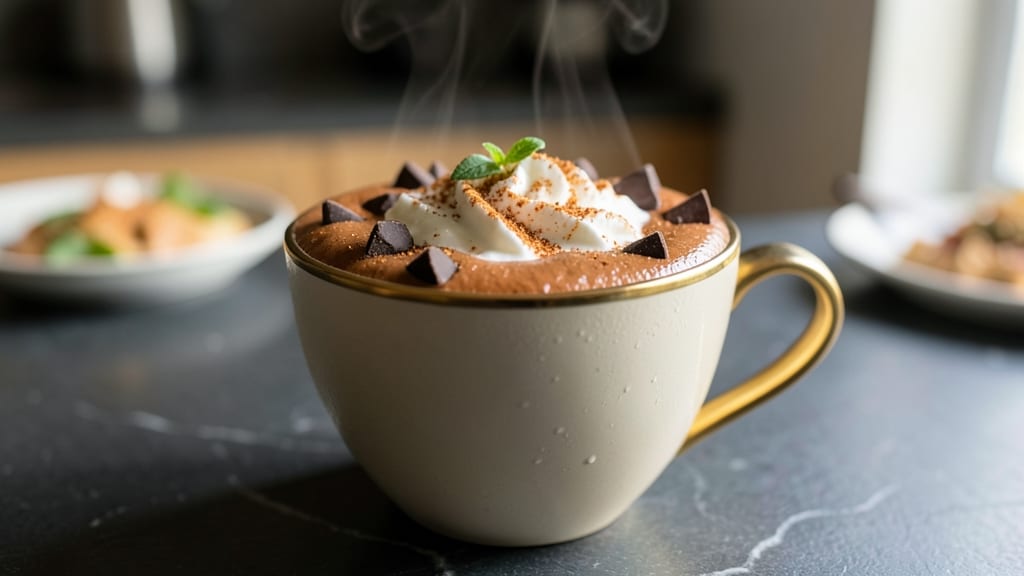
This buttermilk hot chocolate recipe transforms ordinary cocoa into a velvety, tangy masterpiece that feels like a warm hug in every sip. 💛 The secret lies in swapping regular milk for buttermilk, which creates a rich, creamy texture with subtle tang that elevates the chocolate experience.
I developed this version after years of perfecting the balance between sweetness, spice, and that signature buttermilk depth.
The beauty of this recipe is its simplicity—just a handful of pantry staples come together to create a drink that's restaurant-quality at home.
We're talking about ultra-creamy cocoa that's thick enough to drink with a spoon, infused with warm spices like cinnamon and nutmeg, and finished with a touch of vanilla for depth. The buttermilk doesn't just add creaminess; it creates a complex flavor profile that makes this hot chocolate unforgettable.
What you'll end up with is a mug of hot chocolate so luxurious it feels indulgent yet remains balanced enough to enjoy anytime. The buttermilk creates a velvety mouthfeel that's smoother than traditional milk-based versions, while the spices add warmth without overpowering the chocolate's natural richness.
This is the kind of drink that transforms an ordinary evening into something special.
Perfect for cozy nights, holiday gatherings, or anytime you crave something comforting, this recipe scales beautifully—whether you're making one mug or serving a crowd. The best part? It comes together in just minutes, with no fancy equipment required. Let's make this creamy, spiced mug magic!
Ingredients for buttermilk hot chocolate
Just twelve ingredients transform ordinary cocoa into velvety buttermilk hot chocolate magic.
| Ingredient | Amount | Notes |
|---|---|---|
| Buttermilk 🥛 | 2 cups | Full-fat for creamiest texture |
| Dark Chocolate Chips 🍫 | ¾ cup | 70% cocoa or higher preferred |
| Heavy Whipping Cream 🥛 | ½ cup | Full-fat for velvety finish |
| Granulated Sugar 🍚 | ½ cup | Adjust to taste if preferred |
| Ground Cinnamon 🌿 | 1 tbsp | Freshly ground for best flavor |
| Ground Nutmeg 🌿 | ½ tsp | Freshly grated preferred |
| Pure Vanilla Extract 🍋 | 1 tsp | High-quality for depth |
| Salt 🧂 | ¼ tsp | Kosher or sea salt |
| Unsweetened Cocoa Powder 🍫 | ¼ cup | Natural or Dutch-processed |
| Whole Milk 🥛 | ½ cup | For adjusting consistency |
| Melted Butter 🧈 | 2 tbsp | Unsalted for flavor control |
| Whipped Cream 🍦 | ¼ cup | Optional for garnish |
| Mini Marshmallows 🍫 | ¼ cup | Optional for topping |
The buttermilk is the star here—full-fat works best for that signature tang and creaminess. Kroger or Whole Foods carry the best quality, but any store's buttermilk will do. If you're out, sour cream thinned with milk at a 1:1 ratio works in a pinch, though it won't be exactly the same. The chocolate chips should be at least 70% cocoa—avoid the sweetened kind. For the cocoa powder, Hershey's Special Dark is reliable, but Valrhona takes it to another level if you want to splurge. The spices? Freshly ground cinnamon and nutmeg make all the difference—Penzeys has excellent whole spices you can grind yourself.
No buttermilk? Plain yogurt thinned with milk gets you close, though the tang won't be identical. Short on dark chocolate chips? Melted dark chocolate bar works just as well—just chop it into chunks before melting. The vanilla extract matters here—Nielsen-Massey is my go-to, but any pure extract will do. Want to cut sugar? Reduce by 2 tbsp and add 1 tbsp cocoa powder for depth. The whipped cream and marshmallows are totally optional but make it feel extra cozy. If you're making this for a crowd, double the recipe—it scales perfectly.
This reheats beautifully—just add a splash of milk or cream to loosen it up. Store leftovers in the fridge for up to 5 days, though I find it's best enjoyed fresh. For a make-ahead option, pre-mix the dry ingredients (cocoa, sugar, spices) in a jar and store for 3 months. The melted butter can be stored in the fridge for 1 week in a sealed container. Garnish with whipped cream and marshmallows right before serving—they melt too fast to prep ahead. Makes 4 perfect mugs, or one big batch for sharing.
Why You'll Love This Recipe
- No-Fuss Magic: I swear, this takes less time than waiting for the kettle to boil. Just heat buttermilk and sugar, stir in chocolate chips until they melt, then fold in that creamy whipped cream—boom. Five minutes, zero fuss, and it’s ready while you’re still deciding whether to put on socks.
- Rich Twist: The buttermilk adds this tangy depth that makes it way more interesting than plain cocoa. Pair that with dark chocolate chips for bittersweet richness and a dusting of cinnamon? It’s like a grown-up dessert that still feels like a hug in a mug.
- Budget Warmth: I make a double batch and keep it in the fridge for lazy mornings or post-work unwinding. The buttermilk and sugar stretch far, and dark chocolate chips are cheaper than fancy hot chocolate mixes. Warm it up, add a splash of cream, and you’ve got instant cozy without breaking the bank.
Step-by-step instructions for ultra-creamy buttermilk hot chocolate
Here's how to transform simple ingredients into velvety, spiced hot chocolate that tastes like a cozy hug in a mug.
🍳 Step 1: Melt Chocolate and Butter for a Silky Base
In a medium saucepan, combine the 2 cups buttermilk, 0.5 cup granulated sugar, 1 tbsp ground cinnamon, 0.5 tsp ground nutmeg, and 1 tsp pure vanilla extract. I like to use a whisk here to dissolve the sugar completely—no grainy bits allowed. Place this over medium heat and bring just to a gentle simmer, stirring occasionally to prevent scorching.
While the buttermilk mixture heats, add the 0.75 cup dark chocolate chips and 2 tbsp melted butter to the same saucepan. Stir constantly until the chocolate melts completely and the mixture becomes smooth and glossy. You'll know it's ready when the chocolate dissolves evenly and the mixture thickens slightly—about 3-4 minutes. The buttermilk's natural tang balances the richness of the chocolate beautifully, creating that signature creamy texture we're after.
👨🍳 Step 2: Whisk in Cocoa and Cream for Ultra-Richness
Reduce the heat to low and slowly whisk in the 0.25 cup unsweetened cocoa powder until fully incorporated. Here's the thing—adding the cocoa gradually prevents lumps and ensures an even distribution. The mixture will thicken noticeably as the cocoa blooms. Next, pour in the 0.5 cup heavy whipping cream and stir until smooth and velvety.
Taste and adjust sweetness if needed—I usually find the 0.5 cup sugar is perfect, but if you prefer it sweeter, add a little more. The buttermilk's acidity cuts through the richness, but the cream and cocoa powder work together to create that luxurious mouthfeel. This is where the magic happens—the combination of buttermilk, cocoa, and cream creates a texture that's far creamier than traditional hot chocolate.
🥘 Step 3: Adjust Consistency with Whole Milk
If your hot chocolate is too thick, whisk in the 0.5 cup whole milk one tablespoon at a time until you reach your desired consistency. You want it to coat the back of a spoon but still pour smoothly. I usually aim for something between a thick milkshake and a pourable sauce—this ensures it's creamy but still easy to sip. The whole milk also adds a subtle sweetness that rounds out the flavors.
Here's a pro tip: If you're serving this in mugs, you can make it slightly thicker so it holds its shape better. For a more drinkable consistency, add a little extra milk. The buttermilk's natural acidity helps stabilize the mixture, so you won't have to worry about curdling even if you add a bit more liquid. Give it one final taste and adjust seasoning with 0.25 tsp salt if needed—the salt enhances all the flavors and balances the sweetness.
🔥 Step 4: Heat and Garnish to Perfection
Return the saucepan to low heat and let the hot chocolate warm through for 2-3 minutes, stirring occasionally. You don't want it to boil—just warm enough to melt any remaining marshmallows if you're adding them later. The ideal serving temperature is 160-170°F, where it's hot enough to enjoy but not scalding.
To serve, ladle the hot chocolate into mugs and immediately top with 0.25 cup whipped cream and 0.25 cup mini marshmallows. The contrast of the cool whipped cream and marshmallows against the warm chocolate is pure indulgence. For extra flair, sprinkle with an additional pinch of cinnamon or a dusting of cocoa powder. This isn't just hot chocolate—it's a luxurious drinking experience that feels like a warm embrace on a chilly day.
Pro Tips For Making Buttermilk Hot Chocolate
- Whisk the Buttermilk First: Don’t just toss buttermilk in cold—whisk it with sugar and cinnamon until smooth before heating. I learned this the hard way when clumps formed, and the texture turned grainy. A quick 30-second mix prevents lumps and ensures that creamy, velvety finish.
- Use Medium-Low Heat: Buttermilk curdles fast, so keep the heat at a gentle simmer—not a rolling boil. I was skeptical until I tried it: low heat means no scrambled eggs in your cocoa, and the buttermilk’s tang stays bright instead of turning sour.
- Melt Chocolate Slowly: Add dark chocolate chips off the heat—pour in a thin stream while stirring the warm buttermilk mixture. After burning three batches by dumping chips in too fast, I now use a fine-mesh strainer to catch any stray bits. Smoothness matters.
- Sweeten the Cream Last: Whip the heavy cream with sugar after removing the hot chocolate from the stove. This keeps the foam light and airy—adding sugar earlier makes it curdle or turn grainy. (Yes, even if you’re impatient like me, wait.)
Common mistakes when making your buttermilk hot chocolate
Over-Simmering Risks
One of the biggest mistakes is letting your buttermilk hot chocolate simmer too long. The buttermilk's delicate proteins start to break down after 5-6 minutes of active simmering, causing the mixture to separate or develop a grainy texture.
I’ve ruined batches by walking away for just a minute—always keep an eye on it! The ideal simmer time is 3-4 minutes until the chocolate melts completely but before the buttermilk curdles. 🌡️
Skipping the Gradual Cocoa Addition
Adding all the cocoa powder at once creates lumps that are nearly impossible to whisk out. Instead, whisk in the 0.25 cup unsweetened cocoa powder slowly over 1-2 minutes while stirring constantly.
I learned this the hard way—those stubborn lumps are a nightmare to fix. The gradual approach ensures a silky-smooth texture that’s essential for this ultra-creamy version.
Ignoring the Salt Balance
The 0.25 tsp salt might seem insignificant, but it’s crucial for rounding out all the flavors. Without it, the sweetness and richness can feel overwhelming. Taste your hot chocolate before serving—if it tastes flat, add a pinch more salt.
This is especially important when using high-quality dark chocolate, which can be intense on its own. Trust me, your taste buds will thank you! 🧂
Using Low-Quality Chocolate
Not all chocolate chips are created equal! Using anything below 70% cocoa will make your hot chocolate taste artificially sweet and lack depth. I recommend Ghirardelli 72% or Valrhona Guanaja for the best flavor.
If you’re on a budget, Hershey’s Special Dark works in a pinch, but it won’t have the same complexity. The higher the cocoa percentage, the richer and more balanced your final drink will be.
Forgetting to Adjust Consistency
Every buttermilk batch varies slightly in thickness, so don’t assume the recipe will be perfect as written. If your hot chocolate is too thick, add the 0.5 cup whole milk 1 tablespoon at a time until it reaches your ideal consistency.
Too thin? Simmer it gently for another 1-2 minutes to reduce the liquid. The goal is a texture that coats the back of a spoon but still pours smoothly—this ensures every sip is velvety and satisfying.
Overlooking the Garnish Timing
Adding whipped cream and marshmallows too early will make them melt into the hot chocolate, ruining the texture. Instead, top your mugs right before serving so the contrast of warm chocolate and cool toppings creates that perfect indulgent experience.
Pro tip: Dust with extra cocoa powder or cinnamon right before drinking to keep the flavors fresh and vibrant. 🍫
Nutrition facts
Frequently asked questions
Why does buttermilk make hot chocolate creamier than regular milk?
The buttermilk's natural acidity and fat content create a velvety emulsion that's more stable than regular milk. The proteins in buttermilk also help bind the cocoa and cream, resulting in a smoother texture that coats your mouth beautifully. Plus, the slight tang balances the sweetness for a more complex flavor profile!
Can I make this recipe without buttermilk?
Yes! Substitute with 1 cup plain yogurt + 1 cup milk (1:1 ratio) for a similar tangy effect. For a closer match, use 1 cup sour cream + 1 cup milk, though the texture will be slightly thicker. The key is replicating the acidity that makes this version so special.
How do I make this spiced version even warmer?
Add 0.25 tsp ground cardamom or 0.5 tsp chili powder for a subtle kick, or infuse with 1 cinnamon stick while heating. For depth, try 0.5 tsp orange zest—it pairs beautifully with the chocolate. Always taste as you go to avoid overpowering the cocoa's natural flavor.
Will this recipe work in a slow cooker?
Combine all ingredients except toppings in your slow cooker and cook on low heat for 1-2 hours, stirring occasionally. The low-and-slow method enhances the spices beautifully. Just watch the consistency—add milk as needed to reach your desired thickness before serving.
Can I make this vegan?
Yes! Replace the buttermilk with 2 cups unsweetened almond milk + 1 tbsp lemon juice, use coconut cream instead of heavy cream, and ensure your chocolate chips are vegan-certified. The texture will be slightly lighter but still delicious. Add 1 tbsp coconut oil to help with creaminess.