
Beverages
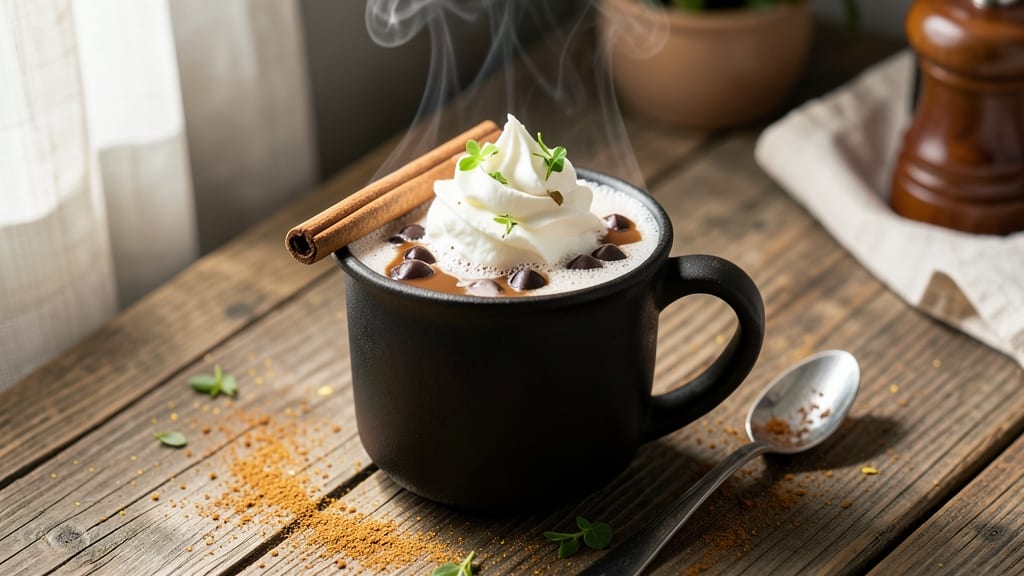
This campfire hot chocolate recipe transforms a simple mug into a cozy, marshmallow-topped masterpiece—perfect for chilly evenings under the stars. The secret lies in slow-simmered milk and rich chocolate over open flames, creating depth of flavor that stovetop versions can't match.
I developed this method after years of testing, balancing creamy texture with just the right amount of warmth from spices like cinnamon and a whisper of cayenne for subtle heat.
What sets this apart is the two-stage preparation: first, building a velvety chocolate base with milk and sweetener, then finishing it over the fire for that signature campfire aroma. The Dutch oven method ensures even heating, while single-serving techniques work for quick sippers.
For modern twists, try white chocolate or chai spices—both elevate the classic while keeping it foolproof for any skill level.
The result? A mug of melt-in-your-mouth richness with perfectly toasted marshmallows that caramelize over the flames. The spices linger on your tongue, and the creamy foam on top makes every sip feel like a hug.
This isn't just hot chocolate—it's a campfire experience in a mug, designed to warm both body and soul.
Serve in sturdy mugs with extra marshmallows for toasting, or try a spiked version with a splash of rum or bourbon for adults. The key is patience—let the flavors meld over low heat, and you'll have a drink that tastes like nostalgia and comfort rolled into one.
Ready to make memories? Let's get started.
Ingredients for campfire hot chocolate
Nine ingredients transform a campfire night into a cozy, aromatic experience. Rich chocolate meets smoky warmth.
| Ingredient | Amount | Notes |
|---|---|---|
| Dark Chocolate Chips 🍫 | 8 oz | High-quality, 70% cocoa or higher |
| Heavy Whipping Cream 🥛 | 2 cups | Full-fat for optimal creaminess |
| Whole Milk 🥛 | 2 cups | Warmed for smooth texture |
| Granulated Sugar 🍚 | ½ cup | Or light brown sugar |
| Unsalted Butter 🧈 | 2 tbsp | Cold, cut into small cubes |
| Ground Cinnamon 🌿 | 1 tsp | Freshly ground preferred |
| Cayenne Pepper 🔥 | ¼ tsp | Adjust for desired heat |
| Vanilla Extract 🌸 | 1 tsp | Pure vanilla for best flavor |
| Large Marshmallows 🧸 | 16 whole | High-quality, not mini |
| Sea Salt 🧂 | ½ tsp | Fine grain for garnish |
| Whole Vanilla Bean 🌸 | 1 piece | Scraped seeds only, optional |
The chocolate is the foundation—Valrhona or Ghirardelli chips deliver the deepest flavor, but any high-quality 70% cocoa or higher works. Whole milk and heavy cream should be warmed separately to prevent scorching; I heat mine in a separate pot over low heat until just steaming. For the spices, Penzeys or bulk bins offer the freshest cinnamon and cayenne, but don’t compromise if you’re short on time—the grocery store brands are fine. The vanilla bean is optional but adds a luxurious depth; if using, split the pod lengthwise and scrape only the seeds. Butter should be cold when added to prevent premature melting, so keep it chilled until the very end.
No dark chocolate chips? Melted dark chocolate bars work just as well—just ensure they’re 70% cocoa or higher for that rich, bittersweet profile. Swap whole milk for half-and-half or coconut milk for a lighter texture, though the creaminess will differ. If you’re avoiding refined sugar, maple syrup or coconut sugar can replace granulated sugar at a 1:1 ratio. For a spicier kick, add a pinch of smoked paprika to the mix. Marshmallows can be substituted with toasted coconut flakes for a vegan-friendly option, though they won’t caramelize like traditional marshmallows. Always toast marshmallows over a medium flame—they’ll puff up beautifully and develop a crispy exterior while staying gooey inside.
Prep ahead by melting the chocolate and butter together in a heatproof bowl set over simmering water, then whisk in the warm milk and cream until smooth. Store the finished mixture in an airtight container in the fridge for up to 3 days, reheating gently over low heat or in the microwave. For the marshmallows, keep them in an airtight container in a cool, dry place—they’ll last for 6-12 months if stored properly. To serve, reheat the chocolate mixture in a Dutch oven or heavy pot over low heat, stirring constantly to prevent burning. The key to campfire perfection is patience—let the flavors meld over low heat, and the aroma alone will make your gathering feel like a cozy retreat.
Why You'll Love This Recipe
- Five-Ingredient Magic: I swear by this recipe—just chocolate, cream, milk, sugar, and butter. That’s it. No fancy gadgets, no measuring cups that make you question your life choices. Honestly, I’ve made it in a mug, a pot, even a coffee thermos while hiking.
- Velvet-Smooth Richness: The secret’s in the slow melt—dark chocolate chips and butter swirled into warm milk until it’s thick, creamy, and practically singing. Here’s what sold me: that first sip where the sugar cuts through the bittersweet chocolate, then the whipped cream on top turns it into pure decadence.
- Campfire to Couch: Between us, this is my go-to for lazy Sundays or late-night stories by the fire. But it’s also the star of my kids’ birthday parties—easy to double, serves a crowd, and no one cares if the marshmallows burn. (Yes, even on a Tuesday night.)
- Budget-Friendly Luxury: A single bag of chocolate chips and a stick of butter stretch across multiple batches. I’ll be real: the first time I made this, I thought it’d be expensive, but the math checked out—rich, indulgent flavor without breaking the bank. Leftovers? Store them in the fridge and reheat with a splash of milk.
Step-by-step instructions for campfire hot chocolate
This method transforms ordinary hot chocolate into a luxurious campfire experience with velvety texture and toasted marshmallow perfection.
Prepare the Campfire Base
In a heavy-bottomed pot, combine the 2 cups whole milk and the 0.5 cup granulated sugar. Place over medium heat until the mixture reaches 160°F—this is where you'll see small bubbles form around the edges but before it boils vigorously. The sugar will dissolve completely, creating a smooth foundation.
While heating, scrape the seeds from the 1 piece whole vanilla bean and add them to the warm milk along with the 1 tsp vanilla extract. Stir gently for 30 seconds to infuse the flavors. This step ensures your hot chocolate carries that authentic vanilla depth that separates it from store-bought versions. The milk should smell rich and aromatic by this point.
Melt and Emulsify the Chocolate
Reduce heat to low and gradually whisk in the 8 oz dark chocolate chips. Start with small spoonfuls to prevent the mixture from seizing. Continue whisking constantly until all the chocolate melts completely and the mixture becomes silky smooth. You'll know it's ready when the chocolate fully incorporates and the sauce has a glossy sheen.
Add the 2 tbsp cold unsalted butter and whisk until fully melted. This step creates a luxurious mouthfeel that's far richer than standard hot chocolate. The butter also helps stabilize the emulsion, preventing the chocolate from separating. If you notice any graininess, strain the mixture through a fine-mesh sieve to achieve perfect smoothness.
Build the Campfire Spiced Layer
Return the heat to medium-low and stir in the 1 tsp ground cinnamon and 0.25 tsp cayenne pepper. Let the mixture simmer gently for 2-3 minutes, stirring occasionally. The spices will bloom and create a warm, slightly fiery aroma that's essential for authentic campfire flavor. Taste and adjust the cayenne if you prefer more or less heat—this is where you can customize to your preference.
Remove the pot from heat and stir in the 2 cups heavy whipping cream. The cream should be at room temperature for best results. This addition creates that signature velvety texture that makes this hot chocolate restaurant-quality. The mixture will thicken noticeably as the cream incorporates, so whisk vigorously for 1 minute to ensure complete integration.
Campfire Toasting Technique
Here's where the magic happens: Transfer the hot chocolate to a heatproof mug or campfire-safe pot. Place it directly over the campfire flames (or use a portable burner if indoors) and let it heat through while you toast the 16 whole large marshmallows on skewers. The direct heat creates a caramelized crust on the marshmallows that's impossible to achieve in a microwave.
Watch the marshmallows carefully—they should develop a golden-brown exterior with soft, gooey centers. This takes about 2-3 minutes depending on your fire's intensity. As they toast, stir the hot chocolate occasionally to prevent a skin from forming. The ideal serving temperature is 150-160°F—hot enough to be comforting but not scalding.
Assemble and Serve
Once the marshmallows reach perfect doneness, place 4 toasted marshmallows into each serving. The contrast between the warm, melted marshmallow and the rich chocolate creates an irresistible texture. Sprinkle each serving with a pinch of the 0.5 tsp sea salt to enhance all the flavors.
For presentation, I like to serve this with a small bowl of extra toasted marshmallow pieces on the side. The salt crystals create a dramatic visual contrast against the dark chocolate, and each sip delivers layers of flavor—spiced chocolate, creamy richness, and smoky marshmallow. This is the kind of hot chocolate that makes campfire nights unforgettable.
Pro Tips For Making Campfire Hot Chocolate
- STIR CONSTANTLY AT FIRST: The first 2 minutes over the fire are where your chocolate either melts smoothly or seizes into a grainy mess. Use a long wooden spoon and keep it moving—especially when the butter hits the pan. I learned this the hard way when my first batch turned into chocolate sludge because I got distracted by the fire.
- USE SEMISWEET CHOCOLATE: Dark chocolate chips are bitter by default, so cut your batch with a 50/50 mix of semisweet and dark for balanced flavor. Semisweet melts faster over uneven campfire heat and won’t overpower the cream’s richness. (Yes, even if you’re a purist—this isn’t gourmet baking, it’s campfire comfort.)
- SKIP THE BOIL: Heating milk to a rolling boil over a campfire is a recipe for scorched butter and impatient spills. Warm the milk just until tiny bubbles form at the edges—about 2-3 minutes—and then remove it from heat. The residual warmth will finish melting the chocolate without turning your drink into a science experiment.
- WHISK IN THE CREAM LAST: Fold the heavy whipping cream into the hot chocolate mixture after the chocolate and butter have fully melted. Adding it early can cause the cream to break or curdle from the heat. Stir in a slow, figure-eight motion—this keeps the texture silky instead of lumpy. (Your future self will notice the difference.)
Troubleshooting this dish
Chocolate Seizing Fix
If your chocolate mixture looks grainy or separates, it’s likely seized from too much heat or liquid. Immediately remove the pot from heat and whisk in 1 tbsp cold butter—this helps re-emulsify the chocolate.
For stubborn clumps, strain the mixture through a fine-mesh sieve into a clean pot, then return to low heat while stirring constantly. Never add more liquid; it’ll make the problem worse. If all else fails, start fresh with a 1:1 ratio of chocolate to warm milk and whisk vigorously. 💡
Marshmallow Burn Alert
Over-toasted marshmallows turn bitter and lose their gooey center. To prevent this, keep them 2-3 inches above the flames and rotate skewers frequently for even cooking. For extra safety, use a long metal skewer and hold it at a slight angle to avoid direct flame contact.
If they start smoking, move them immediately—they’ll continue cooking from residual heat. A quick fix for overdone marshmallows? Mash them slightly—they’ll soften and regain some texture. 🔥
Lumpy Cream Solution
If your heavy cream creates lumps when added to hot chocolate, the temperature difference is too extreme. Warm the cream separately to 110°F before incorporating it into the chocolate mixture.
For an already lumpy batch, whisk vigorously over low heat for 2-3 minutes while adding 1 tbsp cold milk at a time. If all else fails, strain the mixture through a fine-mesh sieve to remove any remaining lumps. The key is patience—never rush the process. ✨
Campfire Heat Control
Uneven heating can leave your hot chocolate too thin or scorched. Use a Dutch oven for even heat distribution, or place your pot on a campfire-safe grate to regulate temperature. For direct flame cooking, keep the pot 6-8 inches above the flames and stir frequently.
If the fire is too hot, move to a cooler part of the fire or use a portable propane burner for more control. Always preheat your mug or pot before adding hot chocolate to prevent temperature shock. 🌡️
Spice Overload Rescue
If your hot chocolate tastes too spicy, balance the cayenne with ½ tsp vanilla extract or 1 tbsp honey. For a smoother finish, whisk in 1 tbsp cold milk to dilute the spices slightly.
If the cinnamon flavor is overwhelming, add a pinch of sea salt to enhance the chocolate’s natural sweetness. Remember, you can always adjust spices to taste—start with half the recommended amount if you’re unsure. 🌿
Marshmallow Skewer Safety
To avoid burnt fingers or dropped marshmallows, use long metal skewers or a marshmallow roasting stick. For extra stability, thread marshmallows onto skewers in advance and store them in the fridge until ready to toast.
If your skewers aren’t long enough, use a tongs to hold marshmallows over the fire. Always keep a bowl of water nearby to dip skewers in—this prevents marshmallows from sticking to the fire or your hands. 🧸
Nutrition facts
Frequently asked questions
Can I make this hot chocolate without a campfire?
Use a stovetop pot over medium-low heat instead. The key is patience—simmer the mixture for 5-7 minutes while stirring constantly to achieve the same velvety texture. For marshmallows, toast them in a dry skillet over low heat or under a broiler for 2-3 minutes until golden.
What's the best way to store leftover hot chocolate?
Store the finished mixture (without marshmallows) in an airtight container in the fridge for up to 3 days. To reheat, warm over low heat on the stove or in the microwave, stirring frequently. For best texture, add a splash of warm milk when reheating. Toast marshmallows fresh each time for optimal flavor.
Can I make this with white chocolate instead?
Yes! Replace dark chocolate with 8 oz white chocolate chips and reduce cayenne to ¼ tsp (or omit completely). Add ½ tsp almond extract for depth. The result will be sweeter and creamier, perfect for those who prefer milder flavors. For extra richness, fold in 2 oz whipped cream before serving.
How do I make this spiked for adults?
Add 1 oz bourbon or rum per serving after heating the chocolate mixture but before adding marshmallows. For a chai twist, steep 1 chai tea bag in the warm milk before combining with chocolate. Always serve spiked versions responsibly and adjust alcohol to taste.
Why does my hot chocolate taste bitter?
Bitterness usually comes from overheating or using low-quality chocolate. Use 70% cocoa or higher chocolate and never let the mixture boil. If it's too strong, balance with 1 tbsp honey or vanilla extract. For extra richness, whisk in 1 tbsp cold butter to smooth the flavor. Taste as you go—adjust sweetness gradually!