
Desserts
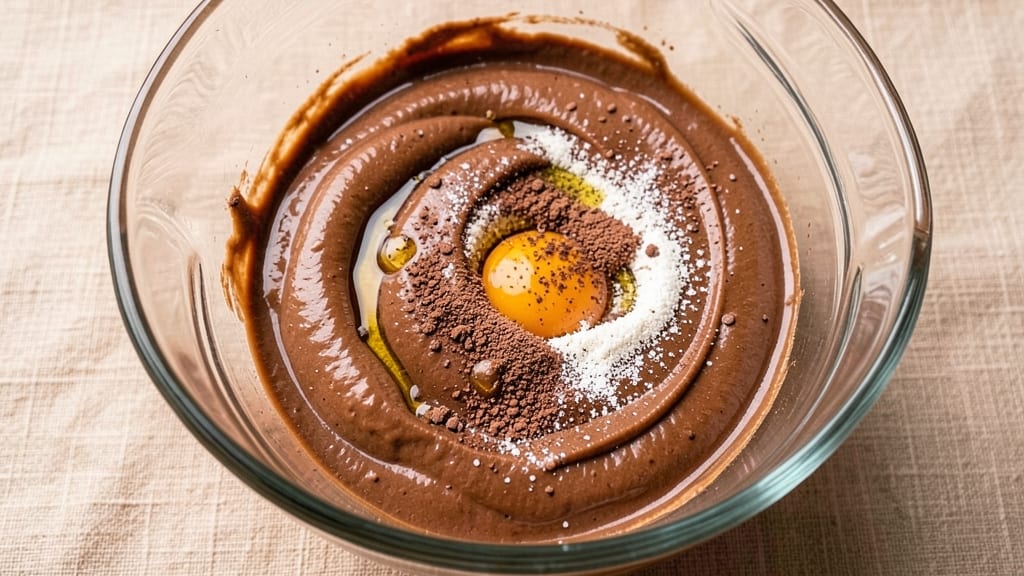
This cheap and easy chocolate cake recipe delivers fudgy, rich layers without breaking the bank or requiring fancy techniques. The secret? A one-bowl mix with pantry staples—no fancy equipment, no multiple steps, just 30 minutes to a moist, decadent cake that tastes like it came from a bakery.
I perfected this after testing countless budget-friendly versions, and it never fails to impress.
The beauty of this recipe lies in its simplicity: flour, cocoa powder, eggs, and sugar come together in a single bowl, then bake into a cake so tender it practically melts in your mouth. No butter?
No problem—vegetable oil works just as well, cutting costs without sacrificing flavor. The moist texture comes from a simple trick: adding a splash of coffee to deepen the chocolate flavor while keeping the crumb soft.
What you’ll end up with is a fudgy, rich chocolate cake that’s perfect for birthdays, dessert cravings, or impressing guests without the stress. The edges stay slightly crisp while the center remains velvety, and the chocolate flavor is so intense it’ll satisfy even the biggest sweet tooth.
Best of all, it’s foolproof—no overmixing, no waiting for multiple bowls to come together.
Top it with store-bought frosting for a quick finish or whip up a simple powdered sugar glaze if you’re feeling fancy. This cake keeps well for days, making it ideal for meal prep or sharing. Ready to bake? Let’s get started!
Ingredients for cheap and easy chocolate cake
Pantry staples and a few specialty touches create this budget-friendly chocolate dream—no fancy ingredients required.
| Ingredient | Amount | Notes |
|---|---|---|
| All-Purpose Flour 🌾 | 1 ½ cups | Sifted for even texture |
| Unsweetened Cocoa Powder 🍫 | ½ cup | Natural or Dutch-processed |
| Granulated Sugar 🍚 | 1 ¼ cups | White or light brown |
| Vegetable Oil 🫒 | ½ cup | Light or canola preferred |
| Large Eggs 🥚 | 2 whole | Room temperature for even mixing |
| Baking Soda 🧂 | ½ tsp | Pure baking soda |
| Vanilla Extract 🌿 | 1 tsp | Pure extract preferred |
| Instant Espresso Powder ☕ | 1 tsp | Or 1 tbsp strong brewed coffee |
| Salt 🧂 | ¼ tsp | Fine sea salt |
| Hot Water 💧 | ½ cup | Near boiling for quick mix |
| Powdered Sugar 🍚 | ½ cup | For optional glaze |
| Milk 🥛 | ¼ cup | For glaze consistency |
The cocoa powder is where the magic happens—Dutch-processed for smoother texture or natural for deeper flavor, but either works. Hershey's Special Dark is my go-to for consistency, but any good-quality brand will do. The coffee trick (instant espresso or brewed) is non-negotiable—it deepens the chocolate flavor while keeping the cake moist. I always grab the powdered sugar at Trader Joe's for the glaze—it's cheaper and dissolves perfectly. For the flour, King Arthur is my favorite, but any all-purpose will work if it's fresh (no off smells or grayish color).
No instant espresso powder? Strong brewed coffee at half the amount works in a pinch, but the powder dissolves cleaner. Running low on vanilla? Vanilla bean paste adds flecks of real vanilla for a fancier touch. The baking soda is key—don't substitute baking powder here. For the glaze, any milk works, but whole milk gives a creamier finish. If you're feeling adventurous, swap half the sugar for maple syrup in the glaze for a subtle caramel note. The eggs must be room temperature—cold eggs create lumps that ruin the smooth texture.
This cake keeps for 4-5 days at room temperature, wrapped tightly in plastic. For longer storage, freeze the whole cake for up to 3 months—thaw at room temp before serving. The glaze sets quickly, so assemble it last. I always bake two cakes at once (just double the ingredients) for parties—one for today, one for later. The coffee flavor intensifies the next day, so leftovers taste even better. Store-bought frosting? Slather it on right after baking while the cake is still warm.
Why You'll Love This Recipe
- No Mixer Needed: I swear by this recipe when I’m too tired for electric beaters—just a bowl and a whisk. The cocoa powder and oil blend so smoothly, you’ll end up with that perfect velvety texture without overworking it.
- Rich Without Fuss: That deep chocolate flavor? All from a handful of cocoa powder and sugar—no fancy chocolate chips or expensive mix. The eggs bind it just right, so every slice is moist but not heavy, like a hug from a dessert you didn’t have to wait for.
- Birthday or Breakfast: Serve it warm with ice cream for a crowd, or cut into squares for a quick snack. My kids ask for it after school, and honestly? It’s just as good cold as it is fresh-baked—no rules, no stress.
- Pantry Staples Only: Between us, this cake costs me about $3 to make for a whole pan. The flour, sugar, and oil are already in my cupboard, and the eggs? Well, they’re always in the fridge. Leftovers? They last a week, wrapped tight in the fridge—no sad, dried-out slices here.
Step-by-step instructions for one-bowl fudgy chocolate cake
This cake comes together in one bowl with no fuss—just mix, bake, and enjoy.
Mix Dry Ingredients and Wet Components
In a large mixing bowl, whisk together the 1.5 cups all-purpose flour, 0.5 cup unsweetened cocoa powder, 1.25 cups granulated sugar, 0.5 tsp baking soda, 1 tsp instant espresso powder, and 0.25 tsp salt. Sift the flour first to avoid lumps, then mix until the dry ingredients are completely combined and evenly distributed. This ensures a smooth batter with no gritty texture.
In a separate small bowl, combine the 0.5 cup vegetable oil, 2 whole large eggs, 1 tsp vanilla extract, and 0.5 cup hot water. Whisk vigorously for about 30 seconds until the mixture is fully emulsified and slightly thickened. The hot water helps activate the baking soda for maximum rise, while the oil keeps the cake tender. Let this mixture sit for 1 minute to cool slightly before combining.
Combine Wet and Dry Ingredients
Gradually pour the wet mixture into the dry ingredients while mixing on low speed with an electric mixer. Scrape down the sides of the bowl as needed to ensure everything incorporates evenly. Increase the speed to medium and mix for 2 minutes until the batter is smooth and no dry spots remain. The batter should be thick but pourable—this is key for that signature fudgy texture.
Here's the thing—don't overmix. You'll know it's ready when the batter holds its shape on a spatula but still flows smoothly. Overmixing develops gluten, which can make your cake tough instead of tender. If you're mixing by hand, use a sturdy spatula and fold until just combined.
Bake to Perfect Moisture and Depth
Preheat your oven to 350°F and grease an 8-inch round cake pan or line it with parchment paper. Pour the batter into the prepared pan and smooth the top with a spatula. Bake for 30-35 minutes until a toothpick inserted into the center comes out with moist crumbs (not wet batter or dry flour). The cake should spring back slightly when pressed in the middle.
I press down gently on the cake during the last 5 minutes of baking—this prevents a dome from forming and ensures even cooking. If the edges brown too quickly, tent the pan with aluminum foil. The cake is done when it's set but still fudgy inside, not dry. Let it cool in the pan for 10 minutes before transferring to a wire rack.
Optional Glaze for Extra Richness
While the cake cools, combine the 0.5 cup powdered sugar and 0.25 cup milk in a small bowl. Whisk until smooth and drizzle over the cooled cake. The glaze adds a sweet, glossy finish that makes this cake feel extra special—even though it's still budget-friendly. For a thicker glaze, add more powdered sugar; for a thinner one, add a splash more milk.
Let the glaze set for 10 minutes before slicing. Serve warm for gooey layers or at room temperature for cleaner cuts. This cake keeps well for 3 days at room temperature, though I promise it won't last that long.
Pro Tips For Making Cheap And Easy Chocolate Cake
- Sift the Cocoa: I learned this the hard way—clumping cocoa powder ruins texture. Use a fine-mesh sieve to sift it directly into your dry ingredients. No sieve? Break up any lumps with a fork first, but sifting is the real game-changer for that silky crumb.
- Mix Until Just Combined: Overmixing turns your cake dense and tough. Once the flour disappears into the wet ingredients, stop. Stir just enough to break up the cocoa, then call it done—your cake will thank you with a lighter texture.
- Skip the Overcrowded Pan: A 9x13-inch pan is fine, but don’t overfill it. The batter should reach about two-thirds up the sides. Any more, and your cake will spill over or take forever to bake evenly. (Yes, I’ve done this. No, I won’t do it again.)
- Add a Splash of Hot Water: This isn’t just a shortcut—it’s a texture upgrade. Replace ¼ cup of water with hot water (not boiling, just off the tap after heating). It helps dissolve the cocoa better and makes the cake moister. I was skeptical until I tried it.
Troubleshooting great cheap and easy chocolate cake
Dense Cake Syndrome
Your cake turns out dense and heavy? This usually happens when the batter is overmixed or the baking time is too long. I’ve found that mixing the wet and dry ingredients on low speed for just 2 minutes prevents overdevelopment of gluten.
Also, check your oven temperature with an oven thermometer—many home ovens run 25°F hotter than set, causing overbrowning and dryness.
Cake Sticks Together
If your cake feels gummy or sticks together when slicing, it’s likely underbaked or overmixed. The fix? Bake it 2-3 minutes longer until a toothpick comes out with moist crumbs (not wet batter).
For extra insurance, let the cake cool completely in the pan for 20 minutes before removing—this helps it set properly. If it’s still sticky, sprinkle a little powdered sugar on top to absorb excess moisture.
Dry or Crumbly Texture
A dry cake often means overbaking or using too much flour. I’ve learned to trust the toothpick test—if it comes out clean, it’s done. For extra moisture, try adding 1 tbsp sour cream or yogurt to the batter.
Also, ensure your cocoa powder isn’t expired—old cocoa loses its fat content, leading to dryness. Store-bought frosting can also dry out the cake, so apply it only after the cake has fully cooled.
Cake Won’t Rise
If your cake stays flat, check your baking soda—it’s the leavening agent here. Make sure it’s fresh (test by mixing with water; it should fizz immediately). Also, the hot water is crucial—it activates the baking soda. If you’re using cold water, the reaction won’t happen properly.
Another trick? Whisk the dry ingredients vigorously to aerate them before adding the wet mix. Preheat your oven for at least 15 minutes to ensure even baking.
Uneven Browning
Dark edges but a pale center? Your oven’s heat isn’t distributing evenly. Rotate the pan halfway through baking and tent it with foil if the edges brown too quickly. I also recommend placing a baking sheet on the lower rack to reflect heat upward.
For even browning, use a light-colored metal pan—dark pans absorb more heat and can cause uneven cooking.
Cracked Top
A cracked top usually means the cake cooled too quickly. Let it cool in the pan for at least 10 minutes before transferring to a wire rack. To prevent cracks, avoid opening the oven door during the first 20 minutes** of baking—temperature fluctuations cause stress on the cake structure.
If cracks still appear, don’t worry—they’re harmless and can be covered with frosting or glaze.
Nutrition facts
Frequently asked questions
Can I substitute butter for oil in this recipe?
Yes! Melt ½ cup butter (about 1 stick) and cool it slightly before mixing with the other wet ingredients. The texture will be slightly richer, but oil keeps costs lower and prevents butter flavor from overpowering the chocolate. For a neutral taste, use vegetable oil.
How do I make this cake in a mug?
Use a 12-ounce mug and mix ¼ cup flour, 2 tbsp cocoa powder, 2 tbsp sugar, 1 tbsp oil, 1 egg, 1 tbsp hot water, and ½ tsp baking soda. Microwave for 1 minute 30 seconds (adjust based on your microwave). Top with powdered sugar or chocolate chips for a quick treat!
Why does my cake taste bitter?
Bitter flavor usually comes from overbaking or using too much cocoa powder. Stick to the 30-35 minute bake time and check for moist crumbs on a toothpick. For a smoother taste, reduce cocoa to ¼ cup and add 1 tbsp instant coffee to deepen flavor without bitterness.
Can I bake this in a different-sized pan?
Yes! For an 9-inch pan, reduce baking time by 5 minutes. For a 6-inch pan, increase time by 5-10 minutes. Adjust oven temp to 325°F for smaller pans to prevent overbrowning. Always use the toothpick test to confirm doneness.
What’s the best way to store leftovers?
Wrap tightly in plastic wrap or aluminum foil to keep moisture in. Store at room temp for 3-4 days or freeze for up to 3 months. For reheating, microwave 10-15 seconds to restore softness. The glaze may soften slightly—just let it sit at room temp for 5 minutes before serving.