
Desserts
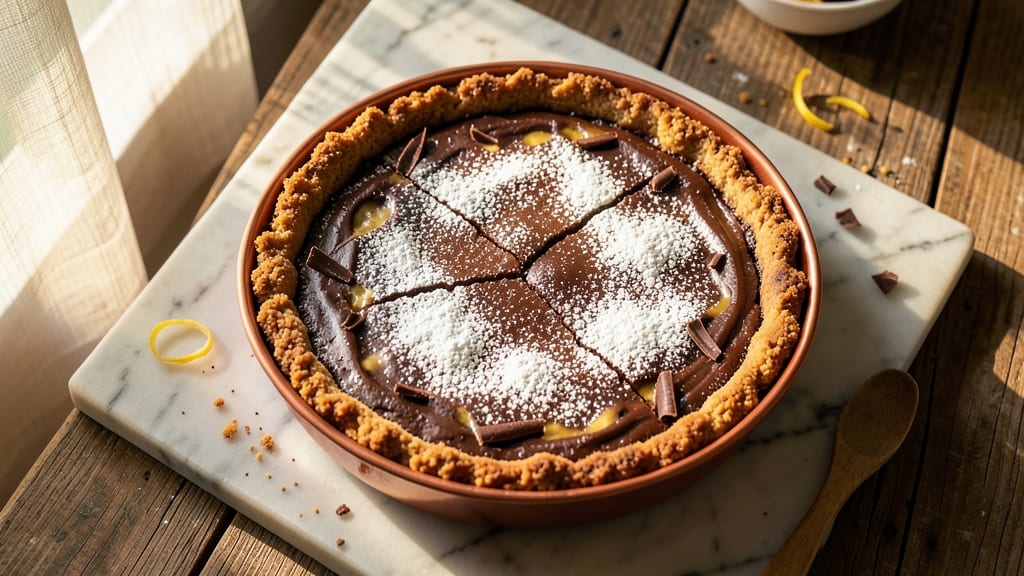
This baked chocolate tart recipe delivers the perfect marriage of crispy cookie crust and rivers of molten chocolate ganache that never fail to impress.
The secret lies in a foolproof blind-baking technique that creates the ideal foundation for that signature glass-bowl crunch, while the ganache filling stays perfectly set yet still melts luxuriously when cut.
I've perfected this version over countless test batches, ensuring the crust holds its shape while the chocolate center remains rich and velvety.
The process begins with a simple yet sturdy cookie crust made from just five ingredients, baked until golden and crisp.
This is followed by the ganache layer—where high-quality chocolate and heavy cream create a filling that's both stable enough to hold its shape and decadent enough to make every bite unforgettable.
The key to success is precise temperature control during the ganache preparation and careful cooling to develop that signature river effect.
What you'll end up with is a showstopping dessert that's elegant enough for special occasions but simple enough for weeknight indulgence. The contrast between the crispy edges and the smooth, glossy chocolate center creates a textural experience that's impossible to resist.
This recipe serves 8-10, making it perfect for gatherings where you want to impress without spending hours in the kitchen.
Optional garnishes like fresh berries, whipped cream, or a sprinkle of flaky sea salt can elevate the presentation even further. The beauty of this tart is its versatility—it works equally well as a standalone dessert or paired with a scoop of vanilla ice cream.
Let's get started on creating this restaurant-quality chocolate tart at home.
Ingredients for baked chocolate tart
These twelve ingredients deliver a restaurant-quality chocolate tart with signature glass-bowl crunch and molten ganache rivers.
| Ingredient | Amount | Notes |
|---|---|---|
| All-Purpose Flour 🌾 | 1 ½ cups | Sifted for even baking texture |
| Granulated Sugar 🍚 | ½ cup | Superfine preferred for smooth texture |
| Unsalted Butter 🧈 | 1 cup | Cold, cubed for crust texture |
| Large Eggs 🥚 | 1 whole | Room temperature for even binding |
| Vanilla Extract 🌿 | 1 tsp | Pure Madagascar bourbon preferred |
| Diamond Crystal Kosher Salt 🧂 | ½ tsp | Fine grain for even distribution |
| High-Quality Dark Chocolate 🍫 | 12 oz | 70% cacao minimum, chopped fine |
| Heavy Whipping Cream 🥛 | 1 cup | Cold, full-fat for proper ganache |
| Granulated White Sugar 🍚 | 2 tbsp | For stabilizing ganache texture |
| Aluminum Foil 📄 | 1 sheet | For blind-baking support |
| Dried Black Pepper 🌶️ | ¼ tsp | Freshly ground for garnish |
| Flaky Sea Salt 🧂 | 1 tbsp | For final presentation |
The chocolate is non-negotiable—Valrhona or Guittard brands deliver the best results, with 70% cacao minimum for proper melting behavior. For the crust, King Arthur flour or Bob's Red Mill produces the most reliable texture. The butter should be European-style if available, as it has higher fat content for better flakiness. Pre-sift your flour and sugar to eliminate air pockets that could weaken the crust during blind-baking. When selecting chocolate, look for bars with vibrant color and minimal bloom—this indicates freshness.
No vanilla extract? Vanilla bean paste works beautifully, or a pinch of cinnamon adds warmth. Substituting the heavy cream? Full-fat coconut cream works but may alter texture slightly. For the sugar in the ganache, powdered sugar can replace granulated at a 1:1 ratio. The crust can be made up to 3 days ahead and stored at room temperature in an airtight container. For the chocolate, Ghirardelli squares are a reliable grocery store option when specialty brands aren't available. Always temper your chocolate properly—melt to 115°F then cool to 80°F—for that signature glossy finish.
Store the assembled tart in an airtight container at room temperature for up to 3 days. For longer storage, freeze the fully cooled tart (before adding garnishes) for up to 1 month. To serve, bring to room temperature for 1-2 hours before slicing—this ensures clean cuts and that perfect molten center. Garnishes like flaky salt or berries should be added just before serving to maintain freshness. The tart's texture improves when served slightly warm, so plan ahead if you're hosting.
Why You'll Love This Recipe
- No-Fuss Crust: I swear by this buttery crust—just flour, sugar, and cold butter mixed until it cracks like sand. No food processor, no fuss, and it holds shape like a dream. (Between us, I’ve burned a few, but this one’s forgiving.)
- Rich Without Effort: That vanilla extract? It’s the secret weapon here. The eggs make it silky, the sugar caramelizes just enough, and suddenly you’ve got a tart that tastes like it took hours—when really, it’s just melted chocolate and patience.
- Party or Pajamas: Bring it to a dinner party or eat it straight from the fridge at midnight. The crust stays crisp, the filling stays luscious, and honestly? It’s the kind of dessert that makes you look like a baking genius without trying.
- Leftovers? Better: This keeps for days—if it lasts that long. The crust doesn’t turn soggy, the chocolate stays glossy, and I’ve reheated slices in the oven or just eaten them cold. (My kids prefer it cold, but I’m not judging.)
Step-by-step instructions for baked chocolate tart
Master the technique for a crisp, buttery crust and luxurious ganache filling that rivals professional bakeries.
Prepare the Crust Mixture
In a large mixing bowl, combine the 1 cup unsalted butter and 0.5 cup granulated sugar. Use a pastry cutter or your fingers to work the butter into the sugar until the mixture resembles coarse crumbs with pea-sized butter pieces. This texture is crucial for achieving that signature flaky, crumbly crust.
Next, add the 1.5 cups all-purpose flour and 0.5 teaspoon diamond crystal kosher salt. Mix gently with a wooden spoon or your fingers until the dry ingredients are just incorporated. Avoid overmixing—you want to preserve the texture that creates those beautiful shards in the finished tart.
Finally, add the 1 whole large egg and 1 teaspoon vanilla extract. Mix until the dough comes together in a shaggy mass. Press the dough into a ball, flatten into a disk, wrap in plastic, and refrigerate for at least 1 hour (or up to 24 hours). Chilling firms the butter, preventing excessive spreading during baking.
Blind-Bake the Crust
Preheat your oven to 375°F. Remove the chilled dough from the refrigerator and roll it out on a lightly floured surface to fit an 8-inch tart pan with removable bottom. Press the dough evenly into the pan, including up the sides, creating a ½-inch high rim. Trim any excess dough.
Line the crust with the 1 sheet aluminum foil, pressing it into the bottom and sides. Fill the foil with pie weights or dried beans to prevent puffing. Bake for 15 minutes, then remove the weights and continue baking for another 10-12 minutes until the edges are golden brown and the base is set but not colored.
Remove the tart shell from the oven and carefully lift out the foil. Return the crust to the oven for 5 minutes to crisp any softened areas. Let cool completely on a wire rack—this prevents sogginess when adding the ganache. The crust should be firm enough to support the weight of the filling without collapsing.
Create the Ganache Filling
Place the 12 ounces high-quality dark chocolate in a heatproof bowl set over a saucepan of simmering water (ensure the bowl doesn't touch the water). Stir occasionally until the chocolate melts completely. Remove from heat and whisk in the 1 cup cold heavy whipping cream and 2 tablespoons granulated white sugar. Let the mixture sit for 2 minutes to thicken slightly.
Stir in the 0.25 teaspoon dried black pepper and 1 teaspoon vanilla extract. The pepper adds a subtle warmth that balances the richness, while the vanilla enhances the chocolate's depth. Pour the ganache into the cooled tart shell, spreading it evenly to create a smooth surface. Refrigerate for 30 minutes to set partially.
Finish and Serve
Remove the tart from the refrigerator and let it sit at room temperature for 10 minutes to soften slightly. This makes the ganache more pliable for creating those signature molten rivers. Use a small offset spatula to gently drag lines through the ganache, creating channels that will fill with chocolate when sliced.
Sprinkle the 1 tablespoon flaky sea salt evenly over the top. The contrast between the salty flakes and rich chocolate is what elevates this tart from ordinary to extraordinary. Serve immediately for the best texture—warm ganache that pools beautifully with each slice, or refrigerate for up to 24 hours for a firmer, more stable dessert.
Pro Tips For Making Baked Chocolate Tart
- CHILL THE BUTTER FIRST: Cold butter makes a flakier crust—trust me, I’ve made this tart with room-temp butter and ended up with a dense, sad bottom. Cut that unsalted butter into tiny cubes, toss them in flour, and press the dough into the pan firmly. The contrast in temperatures is what creates those perfect layers.
- WEIGH YOUR FLOUR: Scooping flour from the bag is asking for trouble—packing varies wildly. Use a kitchen scale for the all-purpose flour; 1 cup isn’t always 120g. Over-measuring means a tough crust, and under? A crumbly mess. Level it off with a knife if you’re stuck measuring by volume, but aim for precision here.
- BAKE UNTIL SPRINGY: The center should jiggle like Jell-O when you press it—yes, even if it looks underbaked. Ovens run hot, and chocolate takes longer to set than it appears. Pull it out when the edges are set but the middle still has a slight wobble, then let it cool completely. Rushing this step = a gummy disaster.
- SALT THE BUTTER: Unsalted butter? Add a pinch of salt—about ¼ teaspoon per ½ cup. I learned this after tasting a tart that was sweet but bland. The salt balances the sugar and vanilla, making the chocolate flavor pop. Skip it, and you’ll wonder why your tart tastes one-dimensional.
Pro cooking tips for perfect results
Perfect Blind-Baking
Blind-baking is the secret to that signature glass-bowl crunch. I use a 375°F oven and bake the crust in two stages: first with pie weights for 15 minutes, then without for 10-12 minutes until golden.
The key is removing the foil just before the final 5-minute crisping phase—this prevents soggy edges when adding the ganache. 🌡️
Ganache Temperature Control
Your ganache's success hinges on precise temperatures. Melt the chocolate to 110-115°F (never boiling) before adding cold cream. The sugar stabilizes the mixture, preventing graininess. Let it sit for 2 minutes after combining—this crucial step develops that perfect velvety texture.
For extra shine, brush the top with a tiny bit of cream before refrigerating.
Crust Chilling Matters
Never skip chilling the dough! I press my dough into a disk, wrap it tightly in plastic, and refrigerate for at least 1 hour (up to 24 hours).
This firms the butter, preventing excessive spreading during baking. Pro tip: Use a 8-inch tart pan with a removable bottom for easy release—no more crust sticking to your pan!
Molten River Technique
For those iconic chocolate rivers, let the tart sit at room temperature for 10 minutes before creating channels. Use a small offset spatula to drag lines through the ganache—think of it like painting rivers.
The heat from your serving plate will make them melt beautifully when sliced. This works best with 70% cacao chocolate that hasn't been tempered too aggressively.
Equipment Essentials
Invest in these three tools: a high-quality tart pan (I love the Nordic Ware brand), a digital thermometer for chocolate temps, and a pie bird (or DIY with foil + beans).
The thermometer ensures perfect chocolate melting, while the pie bird creates that perfect blind-baking support. Don't have pie weights? Dried beans or even uncooked rice work in a pinch. ✨
Nutrition facts
Frequently asked questions
Can I make this chocolate tart without blind-baking?
The crust won't hold its shape properly without blind-baking, but you can try this shortcut: Press the dough into the pan, prick the bottom with a fork, and bake at 350°F for 12-15 minutes with a sheet of parchment and weights. It may not be as crisp, but it'll work in a pinch. For best results, stick with the full blind-baking method for that signature glass-bowl crunch!
How do I prevent the ganache from seeping into the crust?
Make sure your crust is completely cooled before adding the ganache. If it's still warm, the moisture will create a soggy base. Also, chill the ganache for 30 minutes before pouring it into the tart shell. For extra insurance, brush the crust edges with a thin layer of apricot jam before adding the ganache—this creates a moisture barrier.
What's the best way to store leftovers?
Store the tart in an airtight container at room temperature for up to 3 days. For longer storage, freeze the fully assembled tart (before garnishing) for up to 1 month. To serve from frozen, let it thaw in the refrigerator overnight, then bring to room temperature for 1-2 hours before slicing. This prevents clean cuts and maintains that perfect molten center.
Can I make this tart gluten-free?
Yes! Substitute the all-purpose flour with a 1:1 gluten-free flour blend like Bob's Red Mill or King Arthur. For best results, add ½ teaspoon xanthan gum to help bind the crust. You may need to chill the dough longer (up to 2 hours) to prevent spreading. The ganache remains unchanged, so this version will still deliver that rich chocolate experience.
Why did my chocolate rivers disappear when I sliced?
This usually happens if the ganache wasn't chilled long enough before creating the channels, or if the tart was too cold when sliced. Let the tart sit at room temperature for 10 minutes before dragging the spatula through the ganache, and serve at room temperature (not refrigerated). For extra dramatic rivers, use a slightly warmer chocolate (around 90°F) when creating the channels.