
Desserts
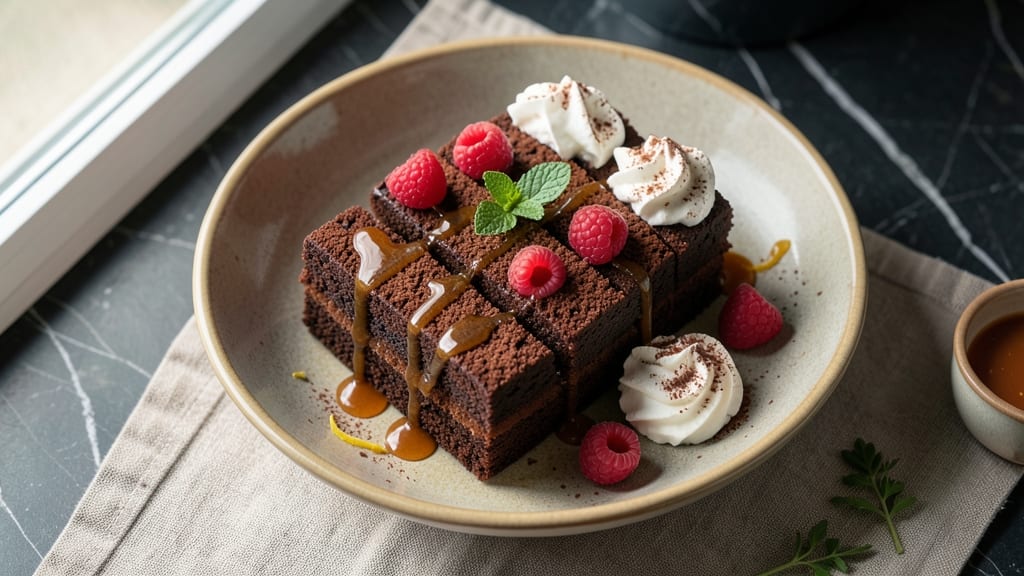
This breakfast chocolate cake recipe flips dessert on its head with layers of moist, tender crumb and pockets of fudgy cocoa crunch—perfect for a morning treat that feels indulgent without weighing you down.
The secret lies in a lightened-up batter with just enough cocoa to satisfy chocolate cravings while keeping the texture airy enough for breakfast. No one will believe it's not a late-night dessert when paired with a steaming cup of coffee or a glass of cold milk.
The magic happens with simple pantry staples and a few professional techniques that ensure moist layers without a dense crumb. We'll use melted butter instead of oil for richness, buttermilk for tenderness, and a touch of espresso powder to deepen the chocolate flavor without bitterness.
The cake bakes in just 30 minutes, leaving you with golden layers that stay soft for days when stored properly.
What sets this apart is the fudgy cocoa crunch between layers—a mix of melted chocolate and crushed cookies that adds texture without overwhelming the delicate cake. Top it with whipped cream or a dusting of powdered sugar, and you've got a breakfast that feels like a celebration.
The best part? It's fast enough for weekdays but special enough for weekends.
Whether you're craving chocolate for breakfast or want to surprise your family with a morning dessert, this recipe delivers. The cake's balanced sweetness and rich cocoa flavor make it a crowd-pleaser, and the light texture ensures it won't leave you feeling sluggish. Ready to bake? Let's get started.
Ingredients for breakfast chocolate cake
Simple pantry staples transform into breakfast's richest chocolate cake—moist layers and fudgy crunch in every bite.
| Ingredient | Amount | Notes |
|---|---|---|
| All-Purpose Flour 🌾 | 2 cups | Sifted for light texture |
| Unsalted Butter 🧈 | 1 cup | Melted, cooled slightly |
| Granulated Sugar 🍚 | 1 ½ cups | Light brown preferred |
| Cocoa Powder 🍫 | ½ cup | Dutch-processed preferred |
| Buttermilk 🥛 | 1 cup | Room temperature |
| Large Eggs 🥚 | 2 whole | Room temperature |
| Espresso Powder ☕ | 1 tbsp | Enhances chocolate flavor |
| Baking Powder 🍞 | 1 ½ tsp | Aluminum-free preferred |
| Salt 🧂 | ½ tsp | Fine sea salt |
| Vanilla Extract 🌿 | 1 tsp | Pure extract preferred |
| Semisweet Chocolate Chips 🍫 | 1 cup | High quality for fudgy layer |
| Crushed Chocolate Cookies 🍪 | 1 cup | Oreos or similar |
| Powdered Sugar 🍚 | ½ cup | For dusting |
| Heavy Whipping Cream 🥛 | 1 cup | For whipped topping |
The cocoa powder and espresso powder are your flavor anchors here. Dutch-processed cocoa (like Hershey's Special Dark) gives a smoother finish, while instant espresso powder deepens the chocolate notes without bitterness. Trader Joe's carries both at great prices, and you'll use them often for chocolate baking. For the butter, Land O'Lakes unsalted is my go-to—it melts beautifully without graininess. The buttermilk? Don't use powdered—it won't give the same tender crumb. If you're fresh out, mix 1 tablespoon lemon juice or vinegar with 1 cup milk and let sit for 5 minutes.
No buttermilk? Plain yogurt or sour cream works in a pinch—just use the same amount. Running low on cocoa powder? Melted dark chocolate at double the amount gets you close, though texture might be slightly denser. The chocolate chips and cookie crumbs are non-negotiable for that signature crunch—Ghirardelli chips and Oreo cookies are the gold standard, but any quality brand works. Short on cookies? Crushed graham crackers or pretzels add a different but still delicious texture. The vanilla extract should be pure—Nielsen-Massey is my favorite, but even the cheap stuff from the grocery store works fine for this recipe.
This cake stays moist for 3-4 days when wrapped tightly in plastic at room temperature, or up to 5 days in the fridge. For longer storage, freeze the layers separately with parchment between them—3 months no problem. The whipped cream topping? Whip it right before serving or it'll get grainy. I like to make a double batch of the filling and freeze half—perfect for lazy mornings when you just want cake without effort. Keep the powdered sugar in an airtight container to prevent clumping, and store it away from moisture.
Why You'll Love This Recipe
- No Mixer Needed: I swear by this recipe when I’m too tired to cream butter and sugar properly. Just melt the butter, mix in the sugar and cocoa, then fold in the dry stuff—no standing at the counter for 10 minutes. The buttermilk keeps it tender without extra effort.
- Rich Without Guilt: That deep, fudgy cocoa flavor hits just right, but the buttermilk keeps it from being heavy. Honestly, the first bite makes me forget it’s breakfast—until I remember how easy it was to make. (Yes, even on a Tuesday night.)
- Leftovers for Days: This cake actually improves after sitting overnight. I’ll slice a warm piece straight from the fridge with a dollop of whipped cream, and suddenly it’s my favorite way to start the day. No sad, dry slices here.
- Budget Breakfast Win: Flour, butter, sugar, cocoa, buttermilk—those are pantry staples, people. I’ve made this for under $3 per serving, and it still tastes like a bakery treat. My college-student friends call it my “poor man’s dessert.”
Step-by-step instructions for breakfast chocolate cake
Here's how to create a breakfast-worthy chocolate cake with rich layers and a fudgy crunch—fast and foolproof.
Prep Ingredients for Perfect Texture
First, sift the 2 cups all-purpose flour and 1.5 tsp baking powder together in a bowl. This lightens the texture and prevents dense layers. In a separate bowl, melt the 1 cup unsalted butter in the microwave in 30-second intervals, stirring between each, until fully melted but not hot. Let it cool slightly—it should be warm to the touch but not liquid.
Whisk the 1.5 cups granulated sugar and 0.5 cup cocoa powder into the melted butter until smooth. The mixture should be silky and free of lumps. I like to use a hand mixer here for about 1 minute—this incorporates air and ensures even distribution of the cocoa, which is key for that deep chocolate flavor.
Combine Wet Ingredients for Moist Layers
Add the 2 whole large eggs, 1 tsp vanilla extract, and 1 tbsp espresso powder to the butter mixture. The espresso powder might seem odd, but it deepens the chocolate flavor without adding bitterness. Whisk until fully combined—you’ll see the mixture lighten slightly as the eggs emulsify.
In a separate bowl, mix the 1 cup buttermilk and 0.5 tsp salt. The buttermilk adds moisture and a subtle tang that balances the richness. Gradually pour this into the butter mixture while whisking gently. This step is where the cake’s tenderness comes from—don’t overmix, or you’ll develop gluten and end up with a tough crumb.
Fold in Dry Ingredients and Chocolate
With the mixer on low speed, add the sifted flour mixture in two additions, mixing just until combined. Scrape down the sides of the bowl to ensure everything is evenly incorporated. Now, fold in the 1 cup semisweet chocolate chips and 1 cup crushed chocolate cookies by hand using a spatula. This creates pockets of fudgy texture throughout the cake.
Here’s the thing—don’t overmix after adding the chocolate. A few streaks of flour are fine; they’ll disappear as the cake bakes. The goal is to distribute the chocolate evenly without breaking it up into tiny pieces, which would make the cake too dense.
Bake for Evenly Cooked Layers
Preheat your oven to 350°F and grease two 8-inch round cake pans (or line them with parchment paper). Divide the batter evenly between the pans—you should have about 1½ cups per pan. Tap the pans gently on the counter to remove any air bubbles, then bake for 25-30 minutes, or until a toothpick inserted into the center comes out clean.
I always check for doneness at the 25-minute mark—your oven might run hot, so start testing early. The edges should be set, but the center should still have a slight bounce. Overbaking dries out the cake, so pull it out as soon as it passes the toothpick test. Let the cakes cool in the pans for 10 minutes, then transfer to a wire rack to cool completely.
Assemble with Whipped Cream Topping
While the cakes cool, whip the 1 cup heavy whipping cream with the 0.5 cup powdered sugar until soft peaks form. This light, airy topping contrasts beautifully with the dense, fudgy layers. Spread a generous layer of whipped cream between the two cake layers, then dust the top with an extra sprinkle of powdered sugar for a finishing touch.
Slice into wedges and serve immediately for the best texture—warm cake with cool whipped cream is pure breakfast bliss. The espresso-infused chocolate flavor pairs perfectly with a cup of coffee, making this the ultimate indulgent morning treat.
Pro Tips For Making Breakfast Chocolate Cake
- Melt Butter Slowly: If you’re dumping cold butter straight into the dry mix, you’re fighting the cake’s texture. Warm the butter to just under 100°F (38°C) first—it blends smoother and creates a finer crumb. I learned this the hard way when my first batch turned out greasy and dense.
- Sift the Cocoa: Lumpy cocoa powder is the enemy of even texture. Sift it with the flour before mixing—this prevents clumps and ensures a silky, uniform batter. (Yes, even if you’re using Dutch-process cocoa, which is already smoother.)
- Don’t Overmix the Batter: The second you see streaks of flour, stop. Overmixing activates the gluten, and that’s how you end up with a cake that’s more bread-like than tender. Fold just until combined—this cake relies on buttermilk’s tang, not structure.
- Test for Doneness Early: Chocolate cakes set faster than vanilla ones. Pull it out when the edges look set but the center still jiggles slightly—it’ll firm up as it cools. I used to wait too long, and the top turned dry. Trust the toothpick: it should come out with moist crumbs, not wet batter.
Common mistakes when making your breakfast chocolate cake
Overmixing the Batter
This is the #1 mistake that turns tender cake into dense brick. Once you add the flour mixture, stop mixing as soon as it's just combined—you should still see small streaks of flour. Overmixing develops gluten, which makes the cake tough.
I've ruined many cakes by mixing too long, so trust the "just combined" rule. The chocolate chips and cookie crumbs need gentle folding by hand after this point. 💫
Skipping the Cooling Step
Rushing to frost or slice warm cake is a recipe for disaster. Let the cakes cool completely in their pans for 10 minutes first, then transfer to a wire rack.
This prevents crumbling and helps the layers set properly. I once tried to slice my cake too soon and ended up with a messy pile—don't make my mistake!
Incorrect Oven Temperature
Your oven might run hotter or cooler than the thermostat suggests. Always preheat for 15 minutes and consider using an oven thermometer to verify 350°F. I learned the hard way when my cake came out underbaked because my oven was actually running at 325°F.
The edges might look done while the center stays raw—test with a toothpick at 25 minutes to avoid this.
Uneven Batter Distribution
Divide the batter evenly between pans (about 1½ cups per 8-inch pan) and tap the pans gently on the counter to release air bubbles. Uneven distribution causes one cake to rise higher than the other, leading to inconsistent texture.
I use a kitchen scale for precision—it's worth the investment for perfect layers every time. 🔥
Substituting Ingredients Improperly
Don't swap buttermilk for regular milk or powdered cocoa for natural cocoa—these changes affect texture and flavor dramatically. If you must substitute, use 1 tbsp lemon juice + 1 cup milk for buttermilk, and measure cocoa powder carefully (natural cocoa is more potent).
I've tried these swaps and regretted them—stick to the recipe for best results.
Overbaking for "Extra Brown"
Cake continues cooking as it cools, so pull it out when the toothpick comes out with moist crumbs (not wet batter). Overbaking dries out the cake and creates a tough exterior.
The perfect moment is when the edges are set but the center still has a slight bounce. Trust your instincts—your cake will thank you! ✨
Nutrition facts
Frequently asked questions
Why does this cake work for breakfast?
The recipe balances rich chocolate flavor with a light, airy texture thanks to buttermilk and espresso powder. The cocoa crunch adds satisfying texture without heaviness, making it perfect alongside coffee or yogurt. Plus, the moist layers stay fresh for days—ideal for morning indulgence!
Can I make this cake in a single layer?
Use one 9-inch round pan and bake for 35-40 minutes at 350°F. For a single-serving version, try a 6-inch pan with 20-25 minutes baking time. Just reduce the chocolate chips and cookies by 1/3 to maintain balance.
How do I store leftovers?
Wrap tightly in plastic wrap at room temperature for 3-4 days or refrigerate for 5 days. For longer storage, freeze layers separately with parchment between them—up to 3 months. Thaw overnight in the fridge before serving.
What's the best way to serve this?
Slice into wedges and serve with whipped cream, a drizzle of warm chocolate sauce, or fresh berries. For extra decadence, add a scoop of vanilla ice cream. The espresso notes make it especially delicious with a cappuccino or hot chocolate!
Can I make this gluten-free?
Yes! Replace the all-purpose flour with a 1:1 gluten-free baking flour blend (like Bob's Red Mill). Add 1 tsp xanthan gum to help bind the cake. The texture will be slightly denser, but still delicious. Test with a small batch first to adjust baking time.