
Desserts
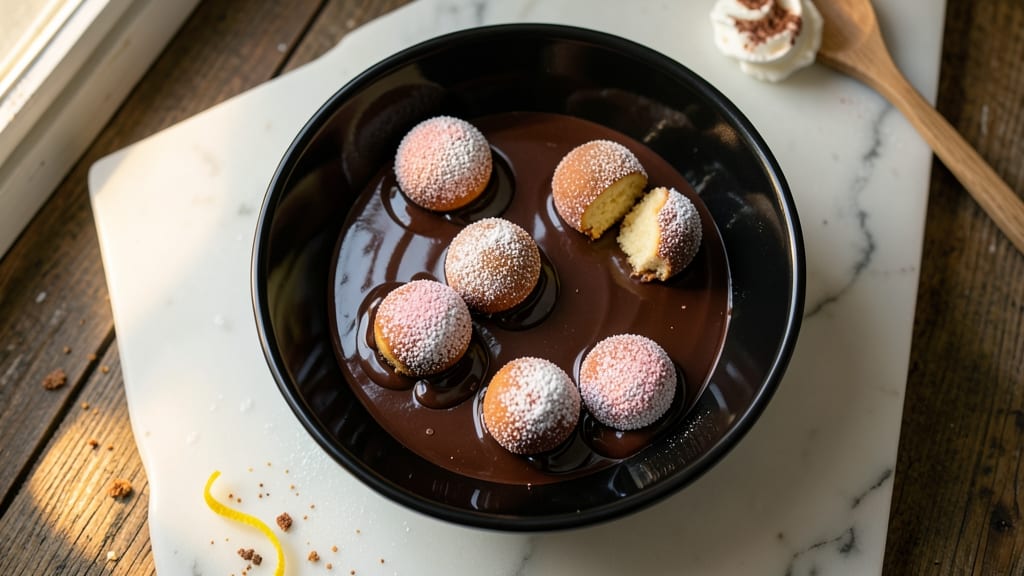
This cake pop dipping chocolate recipe delivers restaurant-quality results with a silky, snapping shell that's impossible to resist. The secret lies in tempering the chocolate properly—creating that perfect balance between smooth texture and satisfying crunch.
I've tested countless methods, and this one consistently produces cake pops that look (and taste) like they came from a bakery, not your kitchen.
The process starts with a simple vanilla cake batter that bakes up moist and flavorful, then gets rolled into balls and chilled until firm. While they set, you'll prepare the dipping chocolate—a foolproof method for achieving glossy, crack-resistant shells that hold up beautifully.
The key is working with the right chocolate-to-butter ratio and letting it cool gradually for that signature snap.
What you'll end up with are cake pops that are visually stunning and delicious—each bite offering a perfect contrast of tender cake and crisp chocolate. The technique ensures your chocolate stays glossy and snaps cleanly, while the cake pops maintain their shape even after dipping.
This is the kind of dessert that elevates any occasion, from holiday parties to everyday treats.
Best of all, the recipe scales easily for gifts or large gatherings, and the dipping chocolate can be reused for multiple batches. Once you master this method, you'll never buy store-bought cake pops again. Let's get started on creating your perfect batch!
Ingredients for cake pop dipping chocolate
Restaurant-quality chocolate shells start with these precise ingredients—each plays a role in that perfect snap and silky finish.
| Ingredient | Amount | Notes |
|---|---|---|
| Dark Chocolate Bars 🍫 | 12 oz | 70% cocoa or higher, chopped |
| Unsalted Butter 🧈 | 6 tbsp | Cold, cubed for tempering |
| Granulated Sugar 🍚 | 1 tbsp | For glossy finish |
| Vanilla Extract 🌿 | ½ tsp | Pure, high-quality preferred |
| Light Corn Syrup 💧 | 1 tsp | For smooth texture |
| Heavy Cream 🥛 | ¼ cup | Cold, for cooling |
| Cake Pop Sticks 🍬 | 16 whole | Wooden, 4-inch preferred |
| Vanilla Cake Mix 🍰 | 1 box | Standard 15.25 oz box |
| Large Eggs 🥚 | 2 whole | Room temperature |
| Milk 🥛 | ½ cup | Whole milk preferred |
| Vegetable Oil 🫒 | ½ cup | For cake batter |
| Powdered Sugar 🍚 | ½ cup | For dusting |
| Aluminum Foil 📄 | 1 sheet | For cooling rack |
The chocolate is everything here. Ghirardelli or Lindt 70% bars are my go-to—they melt smoothly without seizing. If you're using chips instead of bars, chop them into even pieces for consistent melting. Butter matters too: grab the coldest European-style butter you can find (like Plugrá or Land O'Lakes European Style) and cut it into tiny cubes before melting. The vanilla extract should be pure, nothing artificial—Nielsen-Massey or McCormick Pure are solid choices. Pro tip: Toast your corn syrup lightly in a dry pan for 30 seconds to deepen its flavor before using.
No dark chocolate? Semisweet chocolate chips work in a pinch, but you'll need to add an extra 1 oz to compensate for lower cocoa content. Substituting butter? Coconut oil works but alters the texture slightly—use at the same ratio. Running low on vanilla extract? Almond extract at half the amount gives a similar aromatic depth. The cake mix can be homemade if you prefer—just ensure it's moist and flavorful. For the cooling process, if you don't have a cooling rack, crumple aluminum foil into a makeshift rack to prevent soggy bottoms. And trust me on the powdered sugar dusting—it's not just for looks, it prevents sticking when transferring cake pops to the sticks.
This chocolate keeps beautifully once tempered. Store in an airtight container at room temperature for up to 2 weeks, or freeze for 3 months in portions. Re-temper by melting 1/3 of the chocolate and mixing it back in with the rest. The cake batter can be made ahead and chilled for 24 hours—just let it sit at room temperature for 15 minutes before rolling. For large batches, double the chocolate recipe and use a double boiler to maintain even temperature. The secret to perfect cake pops? Patience—let everything cool gradually for that signature snap.
Why You'll Love This Recipe
- Foolproof Melting: I swear by this combo of dark chocolate, butter, and corn syrup—it melts every time without seizing up. No tempering stress, no grainy mess, just silky-smooth chocolate that clings perfectly to cake pops. (Between us, I’ve burned more than one batch trying fancy techniques.)
- Rich Yet Simple: Honestly, the flavor is where it shines. That deep dark chocolate, just a whisper of vanilla, and a touch of sugar—it’s not overpowering, but it’s ridiculously satisfying. The butter adds this luscious mouthfeel that makes it feel like a treat, not a chore.
- Party Magic: Birthday? Holiday? Just because? This chocolate is my secret weapon for last-minute gatherings. It’s fast enough to throw together when friends pop by, and everyone always asks for the recipe. (Yes, even on a Tuesday night.)
- Budget-Friendly Luxury: Here’s what sold me—this uses pantry staples. Dark chocolate bars, butter, sugar? I already had them, and the cost per serving is a fraction of store-bought dipping chocolate. Plus, leftovers keep for weeks in the fridge, so I’m not scrambling to use it all at once.
Step-by-step instructions for silky chocolate shells
Here's how to create that coveted snapping crunch with ultra-smooth chocolate shells.
Prepare the Cake Pop Bases
First, preheat your oven to 350°F and line a baking sheet with parchment paper. In a large mixing bowl, combine the vanilla cake mix, 2 whole large eggs, 0.5 cup milk, 0.5 cup vegetable oil, and 0.5 cup powdered sugar. Mix on medium speed for 2 minutes until fully combined and smooth.
Next, carefully roll the dough into 1-inch diameter balls using a cookie scoop or spoon. Place them on the prepared baking sheet, spacing them about 2 inches apart to allow for even baking. Bake for 10-12 minutes until the tops spring back when gently pressed. Let them cool completely on a wire rack before inserting the 16 whole cake pop sticks.
Temper the Chocolate for Perfect Shells
Chop the 12 oz dark chocolate bars into small, even pieces. In a heatproof bowl set over a saucepan of simmering water (ensure the bowl doesn't touch the water), melt 6 tbsp unsalted butter and 1 tbsp granulated sugar together. Remove from heat and stir in the chopped chocolate until completely smooth.
Now for the tempering: slowly whisk in 0.25 cup heavy cream and 1 tsp light corn syrup until the mixture reaches 115°F. This step is critical—it ensures your chocolate will snap cleanly and have that glossy finish. To test, dip a spoon in the chocolate and let it cool. If it sets quickly and has a shiny surface, you're ready to proceed.
Dip and Set the Cake Pops
Line a baking sheet with the aluminum foil and cover it with a thin layer of powdered sugar for easy release. Working quickly, dip each cake pop into the tempered chocolate, allowing excess to drip off. Use the foil to gently tap off any drips, then place the dipped pops on the prepared baking sheet.
Refrigerate the cake pops for 30 minutes to set completely. Here's the thing—patience is key. If you rush this step, the chocolate won't harden properly, and you'll lose that perfect snapping crunch. Once set, they should release cleanly from the foil with a satisfying snap.
Add Final Touches for Presentation
Remove the cake pops from the refrigerator and let them sit at room temperature for 5-10 minutes to slightly soften. This makes them easier to handle and gives you that professional finish. Use a small spoon or your fingers to gently press additional chocolate onto the top of each pop, creating decorative swirls or patterns.
Let them set for another 10 minutes before serving. The final result should be a cake pop with a glossy, snapping chocolate shell that melts beautifully in your mouth. Store any leftovers in an airtight container in the refrigerator for up to 1 week, though they're likely to disappear much sooner!
Pro Tips For Making Cake Pop Dipping Chocolate
- CHOP CHOCOLATE SMALL: Dark chocolate bars break unevenly—melted chunks ruin the texture. Pulse them in a food processor for 10 seconds first, then chop into ¼-inch pieces by hand. This ensures smooth melting and no surprises when dipping.
- MELT LOW AND SLOW: High heat seizes chocolate like a bad first date. Use a double boiler or microwave in 20-second bursts at 50% power, stirring between each. The goal is 110°F—any hotter and you’ll end up with grainy, sad chocolate.
- WHISK IN THE SYRUP: Skip the corn syrup? Your chocolate will seize like glue. Warm it slightly (30 seconds in the microwave) before whisking it into the melted chocolate—this prevents clumping and keeps the dipping sauce silky. Cold syrup is the enemy.
- TEST THE TEMPERATURE: Chocolate that’s too thick coats cake pops like armor; too thin and it drips everywhere. Dip a clean spoon in, let it cool 30 seconds, then run a finger through it—if it leaves a clean line, it’s perfect. Adjust with more chocolate or a splash of cream if needed.
Troubleshooting perfect results
Chocolate Won’t Set
If your chocolate stays sticky and never hardens, you likely skipped the tempering step or didn’t cool it properly. The fix? Re-temper your chocolate by melting ⅓ of it in a double boiler until it reaches 110°F, then whisk it back into the remaining chocolate.
Let it cool to 88°F—this creates the perfect crystalline structure for that satisfying snap. 🌡️
Cake Pops Fall Off Sticks
This usually happens when the cake isn’t fully baked or the sticks are inserted too soon. Let your cake pops cool completely before inserting sticks, and ensure they’re 100% set before dipping. For extra security, chill them in the freezer for 10 minutes before dipping.
I’ve also found that using wooden skewers with a slightly tapered end (like Wilton cake pop sticks) prevents slipping.
Chocolate Looks Dull
A matte finish means your chocolate isn’t properly tempered or has absorbed moisture. To fix it, re-temper your chocolate and ensure your work area is dry. Dust your hands and tools with powdered sugar before handling.
If the chocolate is already on the pops, lightly brush them with food-grade mineral oil (like Crisco) to restore shine.
Cake Pops Are Too Soft
Overbaking can dry out the cake, but underbaking makes it gummy. Bake your cake pops until a toothpick inserted comes out clean, then let them cool 100% before inserting sticks. If they’re still too soft after dipping, chill them in the freezer for 5 minutes before serving.
For extra stability, roll the sticks in powdered sugar before inserting them into the cake.
Chocolate Seizes or Separates
This happens when moisture gets into your chocolate during melting. Always work with dry ingredients and use a double boiler (not direct heat) to melt chocolate. If it seizes, whisk in 1 tsp vegetable oil to smooth it out.
To prevent future issues, store your chocolate in an airtight container with a silica gel packet to absorb moisture.
Drips Won’t Stop
Excessive drips mean your chocolate is too thin or the cake pops aren’t fully set. Let your tempered chocolate cool to 88-90°F before dipping—this thickens it slightly.
If drips persist, tap the pops gently on the foil-lined tray to remove excess, then place them on a wire rack to let drips harden and fall away naturally. 💡
Nutrition facts
Frequently asked questions
Can I use milk chocolate instead of dark chocolate for dipping?
Yes, but expect a softer texture and less snapping crunch. Dark chocolate's higher cocoa content creates that satisfying snap, while milk chocolate will be smoother and creamier. For best results, use a 70% cocoa or higher dark chocolate—this gives you the perfect balance of flavor and texture. If you prefer milk chocolate, temper it at 86°F instead of 88°F for a firmer shell.
How do I store leftover dipping chocolate?
Transfer the tempered chocolate to an airtight container and let it cool completely at room temperature. It will keep for 2 weeks in a cool, dry place. For longer storage, freeze portions in small containers for up to 3 months. To reuse frozen chocolate, thaw it gently in a double boiler, then re-temper by bringing it back to 110°F and cooling to 88°F.
What’s the best way to remove cake pops from the sticks after dipping?
Gently run a butter knife around the base of the chocolate shell while holding the stick. The heat from your hand will help loosen it—just be careful not to melt the chocolate. For extra stubborn pops, chill them in the freezer for 5 minutes first to make removal easier. Pro tip: Use wooden sticks with tapered ends (like Wilton brand) for cleaner separation.
Can I make cake pops without a cake mix?
Homemade cake works perfectly—just ensure it's moist and flavorful. A simple vanilla cake with 1 cup butter, 1.5 cups sugar, 2 eggs, 2 cups flour, and 1 tsp vanilla will give you great results. Bake until a toothpick comes out clean, then let cool completely before rolling into balls. The key is using a batter that's thick enough to hold its shape when dipped.
Why does my chocolate keep getting streaky when dipping?
Streaky chocolate usually means your tempering isn't consistent. Check your temperature—it should be between 88-90°F for dipping. If it's too cool, reheat it gently to 90°F and stir until smooth. Also, ensure your cake pops are completely dry before dipping, as any moisture can cause the chocolate to seize. Work quickly and keep your tools clean for the smoothest finish.